Introduction & Overview
The SKILLS Document Management System (DMS) is a web-based platform designed to manage, organize, and archive digital documents for the Interreg IPA South Adriatic SKILLS project. The system provides tools for document capture, storage, retrieval, and collaboration across the project team.
Key Features
- Centralized document storage with full-text search across all content
- Automatic OCR (Optical Character Recognition) for scanned documents and images
- Flexible organization using tags, storage paths, and custom metadata fields
- Support for 20+ document formats including PDF, Office documents, images, and more
- Built-in document editor powered by OnlyOffice for editing Word, Excel, and PowerPoint files
- Role-based access control with user and group permissions
- Bulk operations for efficient batch processing
- Soft-delete with trash and document recovery
- Task monitoring for document processing status
- Multi-language interface support
System Access
The DMS platform is accessible through any modern web browser at:
https://info.southadriaticskills.org
Supported browsers: Google Chrome (recommended), Mozilla Firefox, Microsoft Edge, Safari.
Navigation Overview
The platform interface is organized into the following main sections, accessible from the left sidebar:
| Section | Description |
|---|---|
| Dashboard | Home page with statistics and quick upload |
| Documents | Browse, search, and manage all documents |
| Tags | Create and manage tags for document organization |
| Storage Paths | Define organizational paths for documents |
| Custom Fields | Create custom metadata fields for documents |
| Trash | View and recover deleted documents |
| Users & Groups | Manage user accounts and groups (Admin) |
| File Tasks | Monitor document processing tasks |
| Logs | View system activity logs (Admin) |
Getting Started
Logging In
To access the SKILLS DMS platform, follow these steps:
- Open your web browser and navigate to https://info.southadriaticskills.org
- You will see the Sign In page
- Enter your Username or Email address in the first field
- Enter your Password in the second field
- Click the "Sign in" button
If you have forgotten your password, click the "Forgot your password?" link below the sign-in form. You will receive an email with instructions to reset your password.
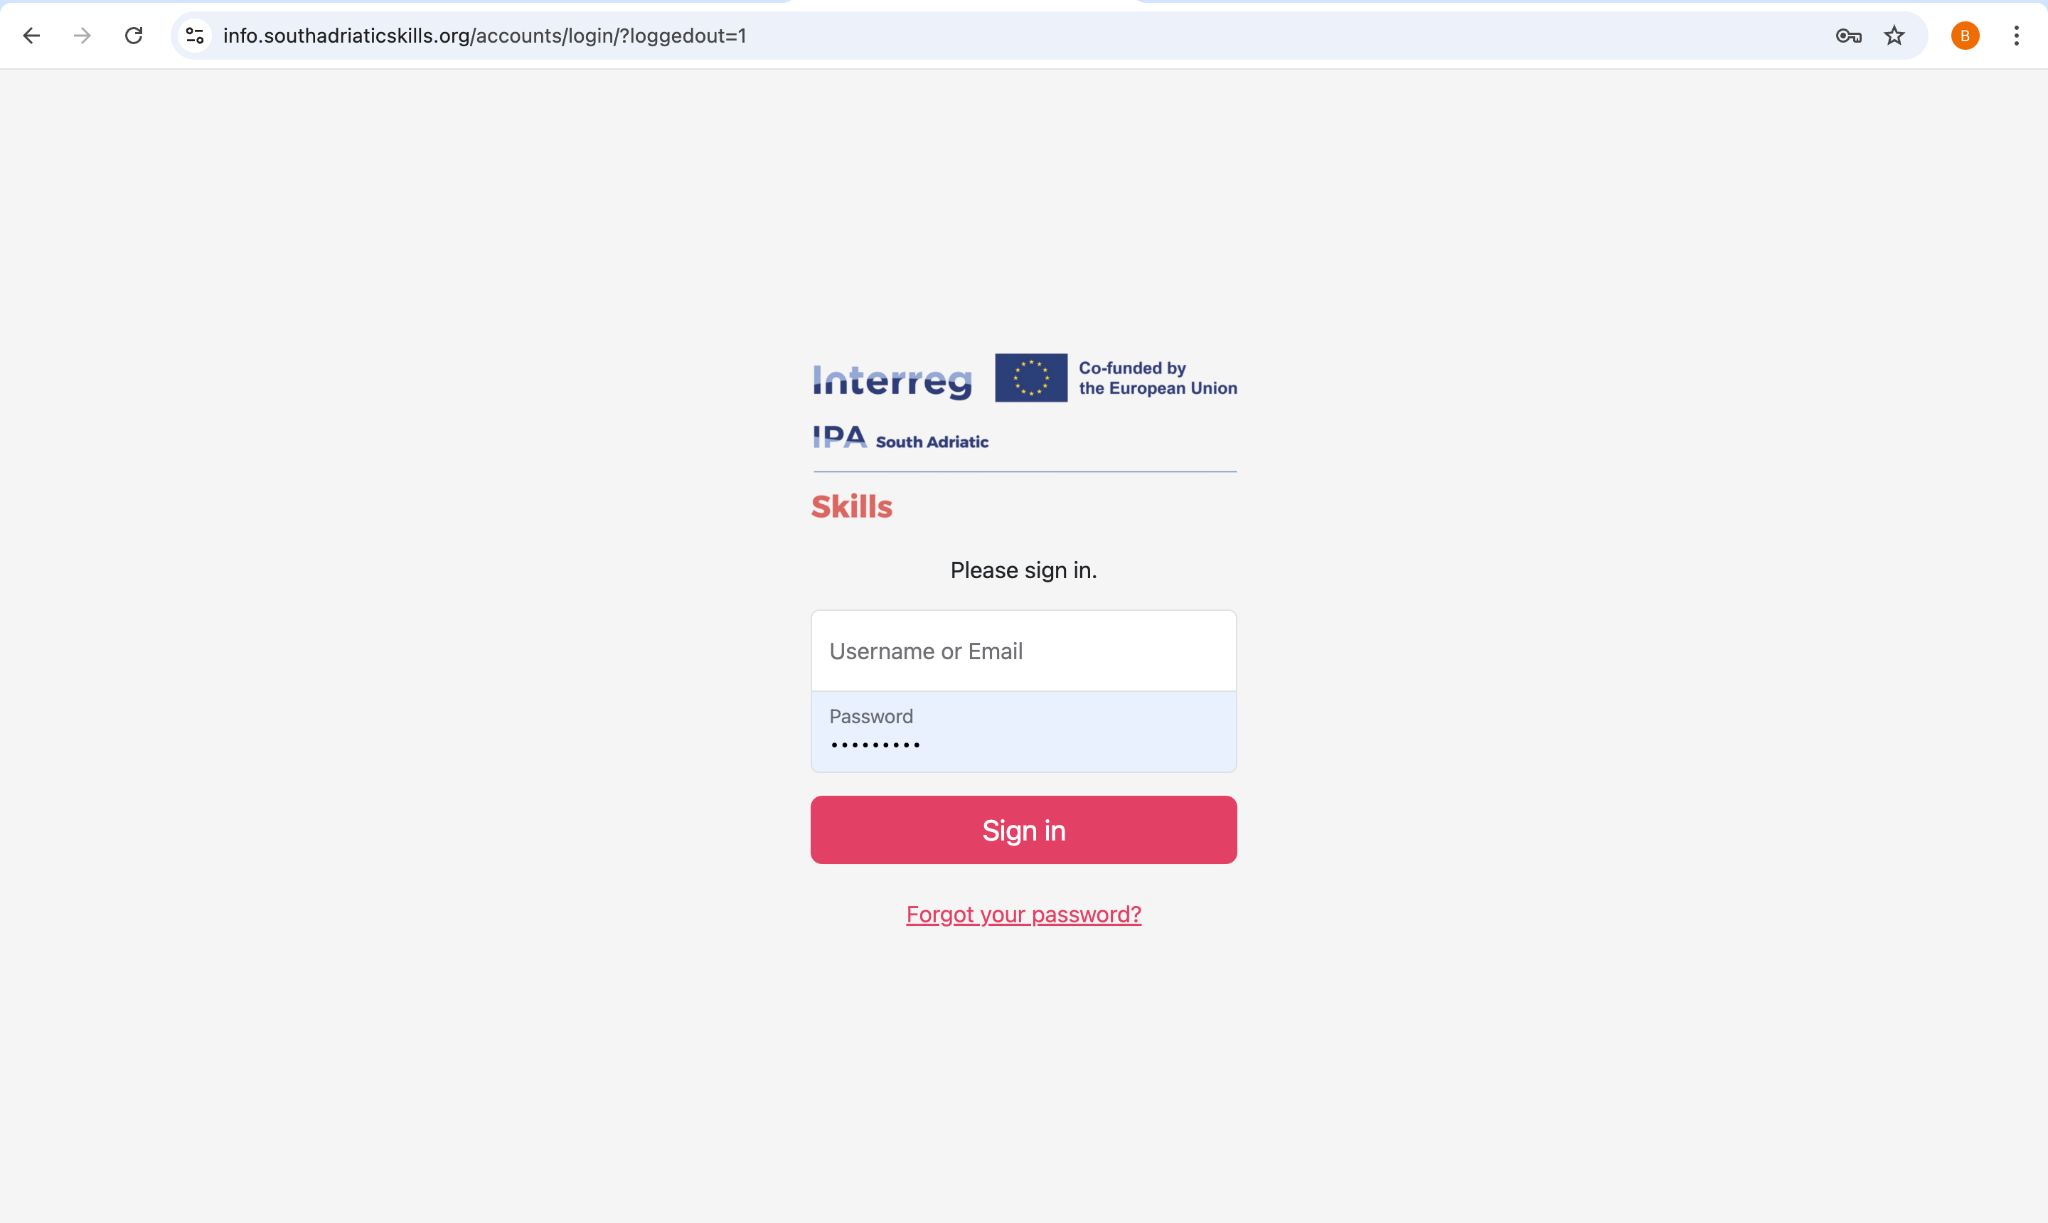
📸 Figure 2.1 — The SKILLS DMS sign-in screen
Changing Your Password
To update your password after first login:
- Click on your username or profile icon in the top-right corner
- Select "My Profile" from the dropdown menu
- Enter your current password and your new password
- Confirm the new password and save changes
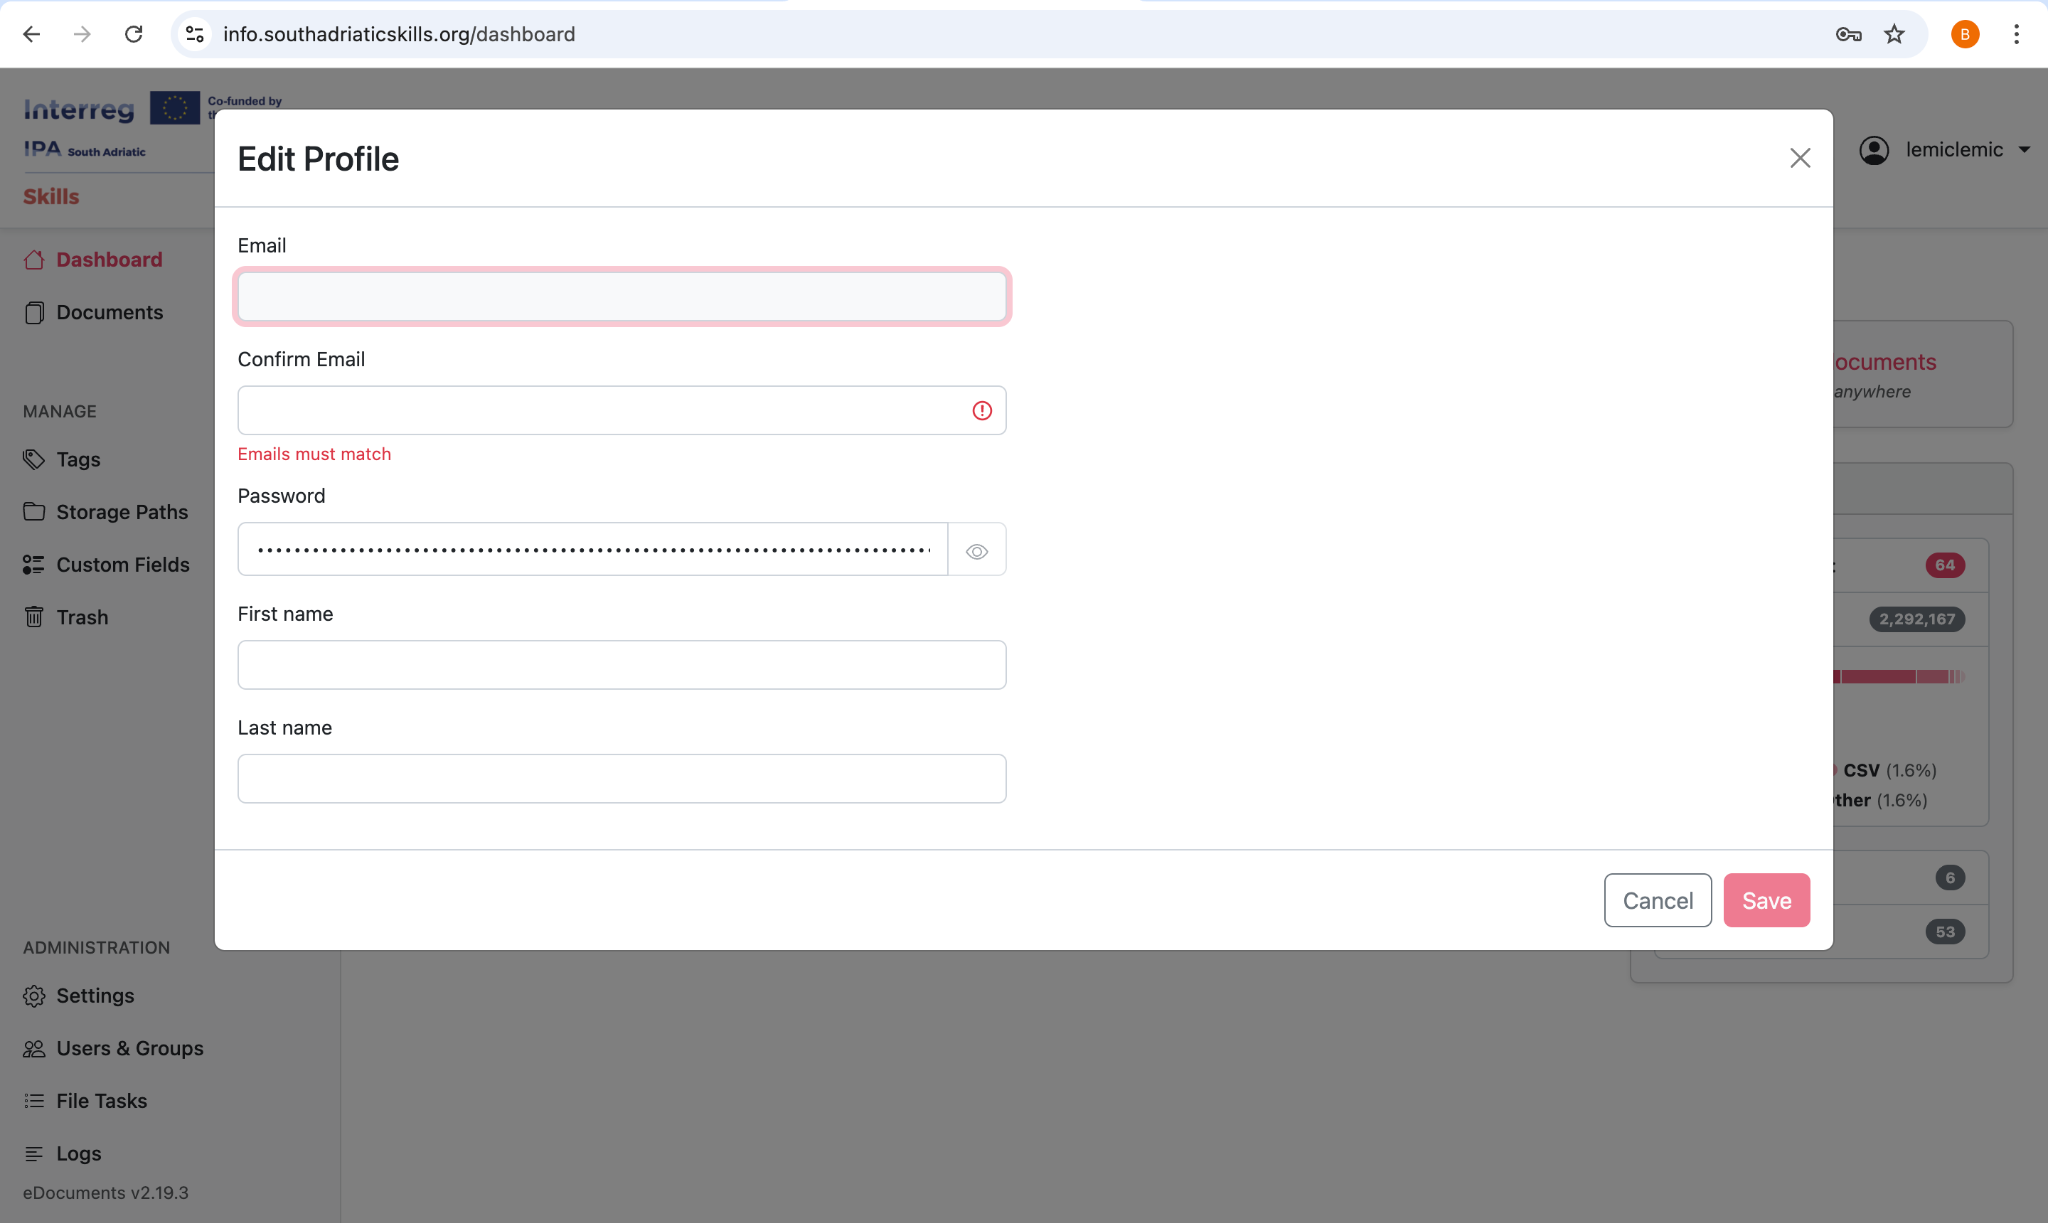
📸 Figure 2.2 — Changing your password from My Profile
Navigating the Interface
The DMS interface consists of three main areas:
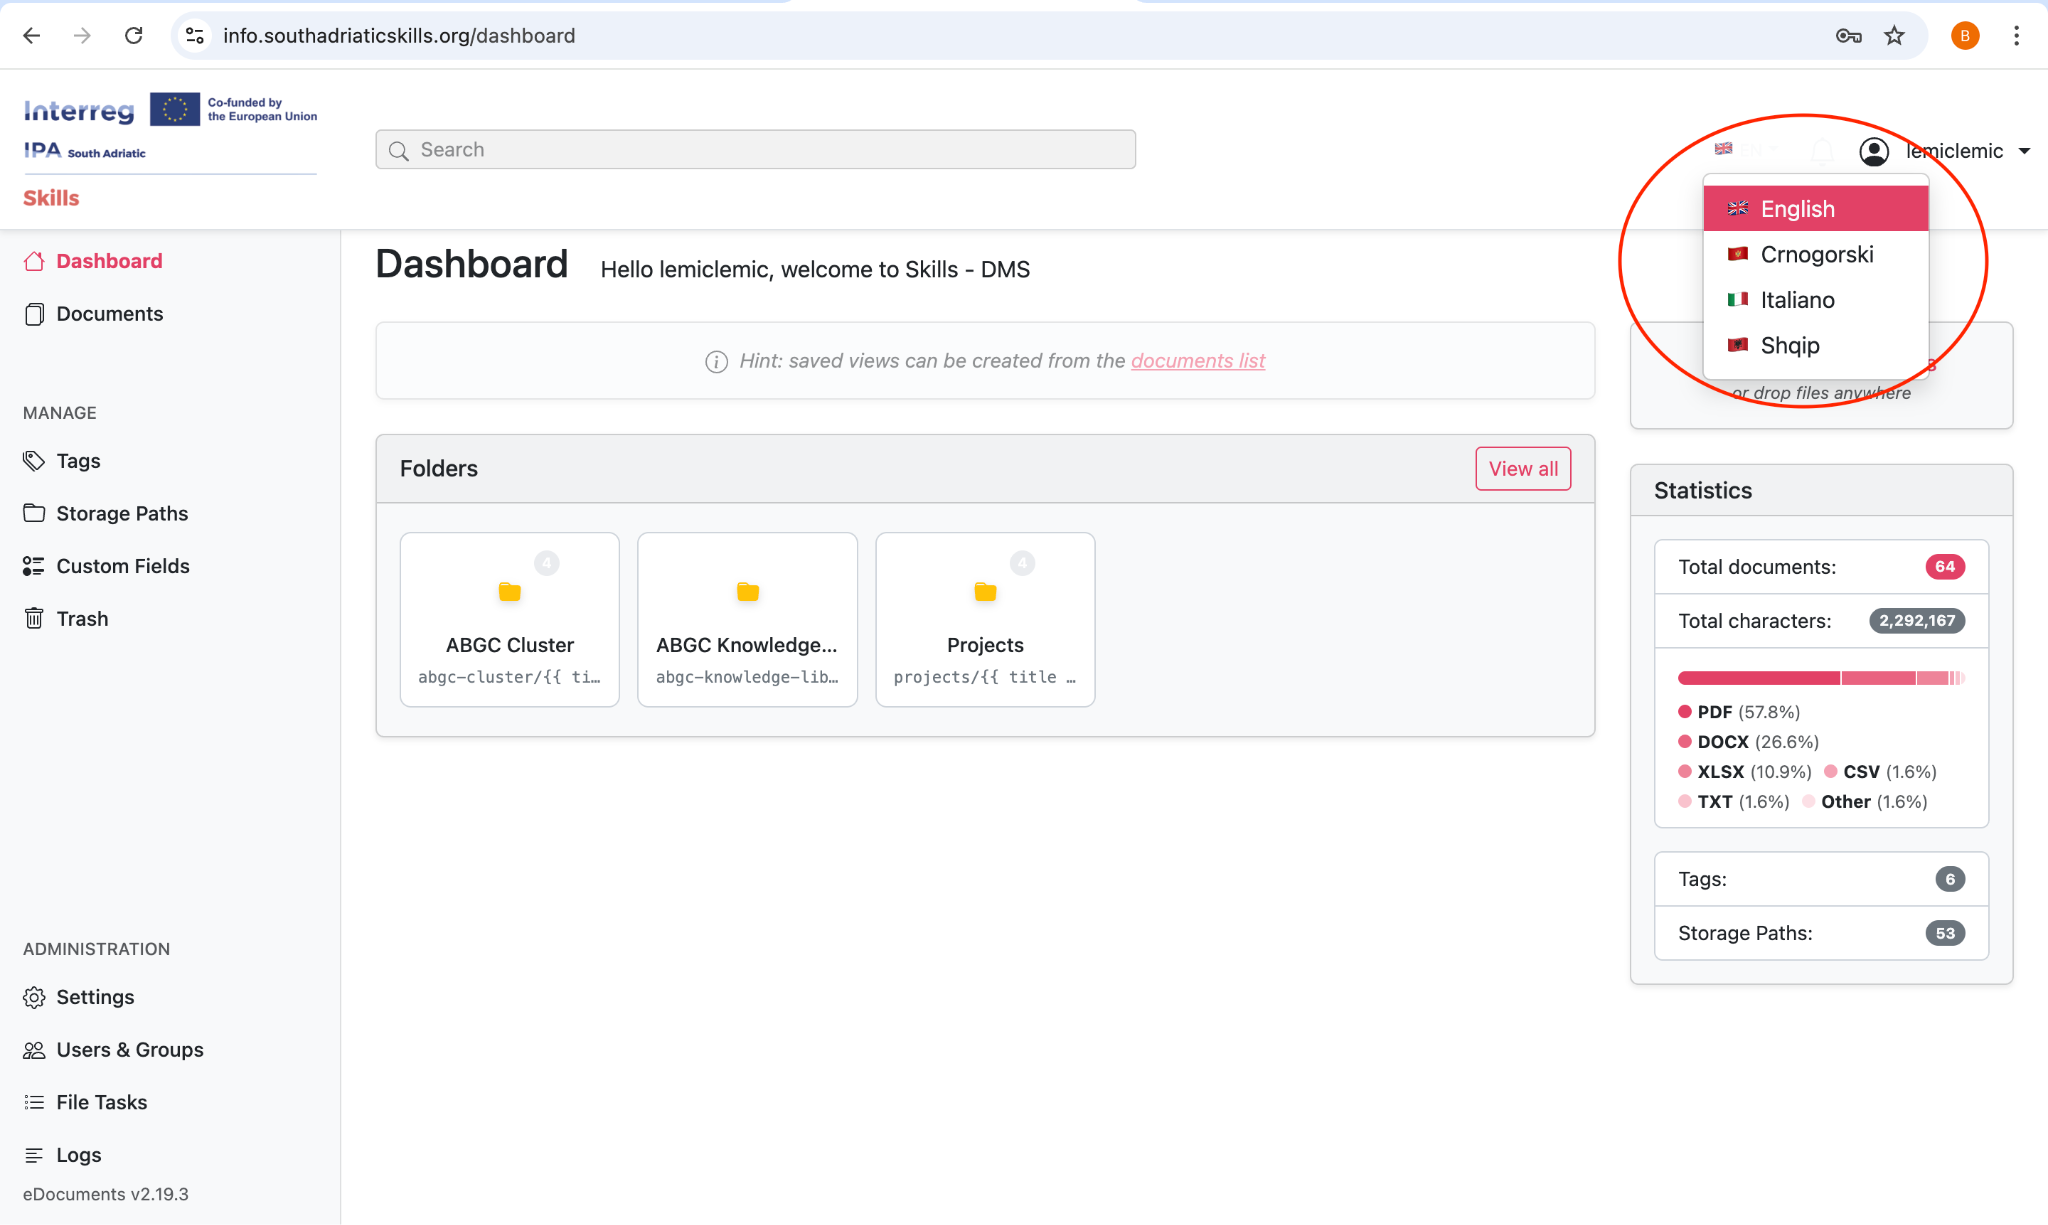
📸 Figure 2.3 — Overview of the main DMS interface and Language settings
Language Settings
The platform supports multiple interface languages. To change the language:
- Click on the language switcher in the sidebar or settings
- Select your preferred language from the available options
- The interface will update immediately
Dashboard
The Dashboard is your home screen after logging in. It provides a quick overview of your document library and convenient access to common actions.
Dashboard Components
Welcome Section
Displays a welcome message and provides quick-start links to common actions such as uploading a new document.
Upload Widget
A drag-and-drop area that allows you to quickly upload documents directly from the dashboard. Simply drag files from your computer onto this area, or click to browse and select files.
Statistics Overview
Shows a summary of your document library including the total number of documents and a breakdown by file type (PDF, images, Office documents, text files, etc.).
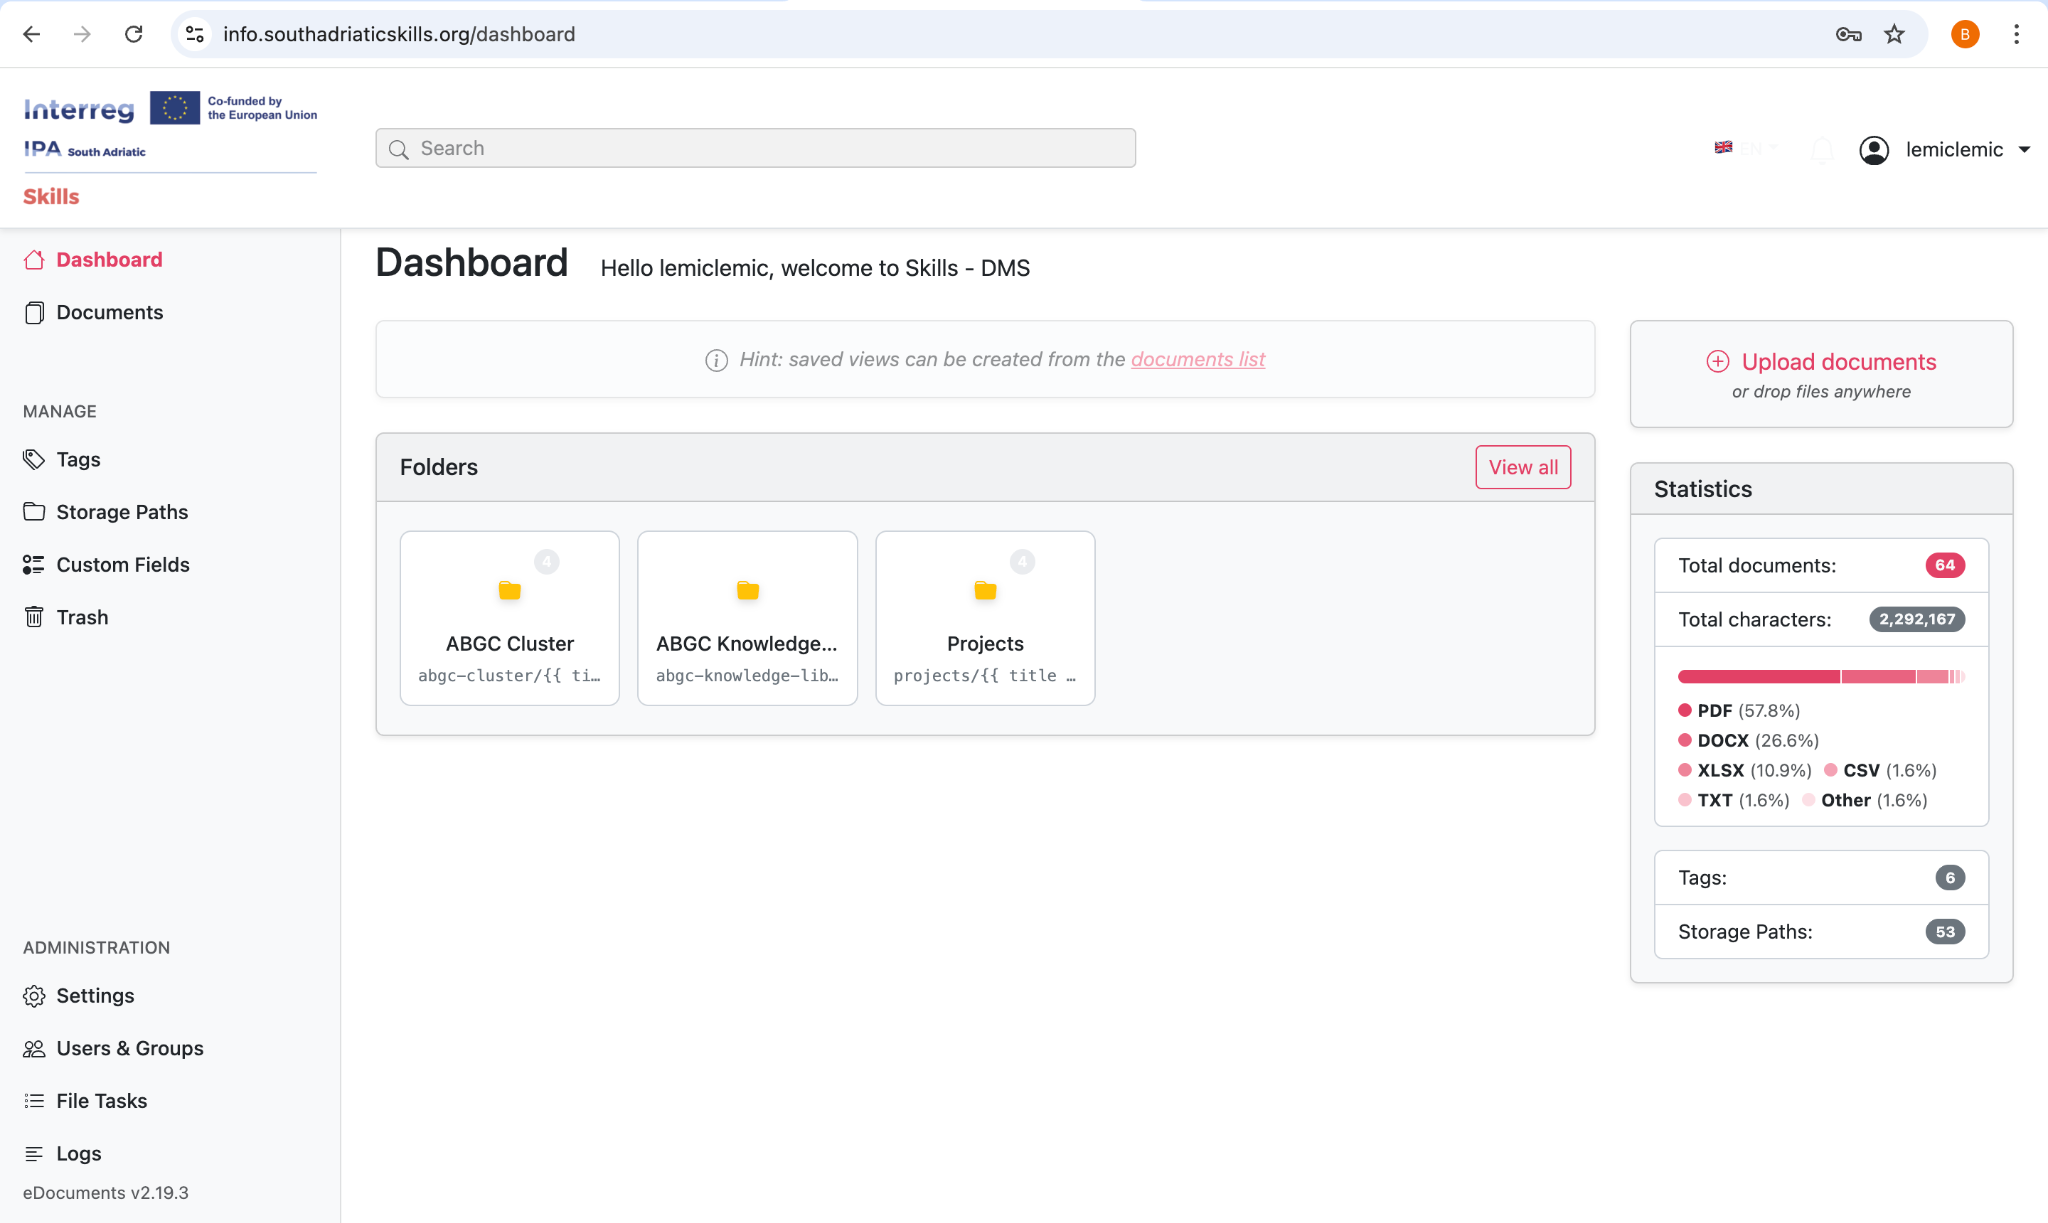
📸 Figure 3.1 — The Main Dashboard
Document Management
Document List
The Document List is the primary view for browsing and managing your documents. Access it by clicking "Documents" in the left sidebar.
Display Modes
Sorting
Click on any column header in table view to sort. Available sort options:
- Title (alphabetical)
- Date created / Date added / Date modified
- Archive Serial Number (ASN)
- Page count
- Number of notes
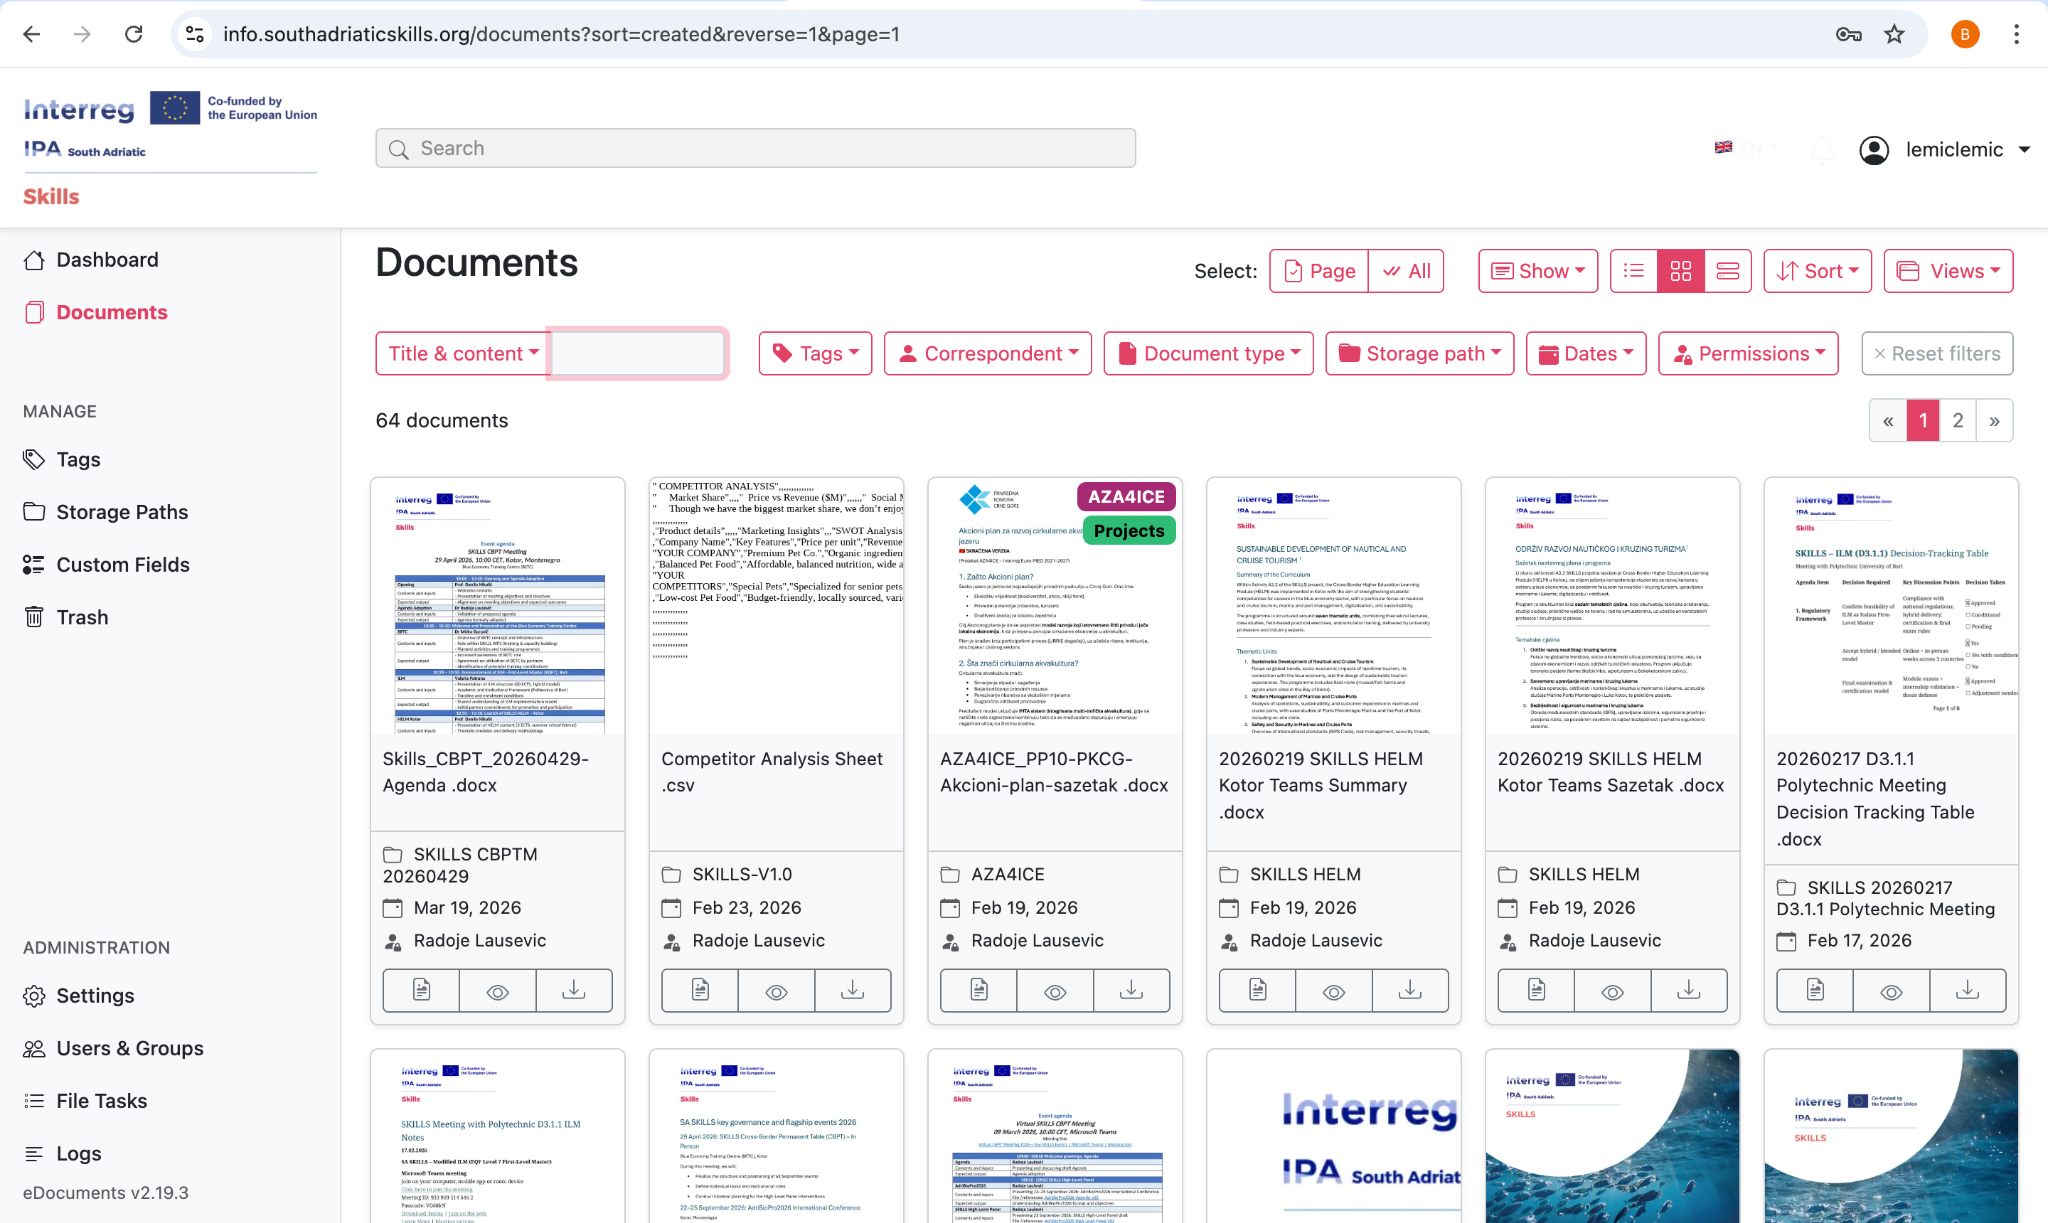
📸 Figure 4.1 — Document list in table view
Viewing a Document
Click on any document to open its detail view, which includes:
Editing Document Metadata
To edit a document's properties:
- Open the document by clicking on it in the list
- Modify any of the available fields in the metadata panel
- Click "Save" to apply your changes
Editable fields include:
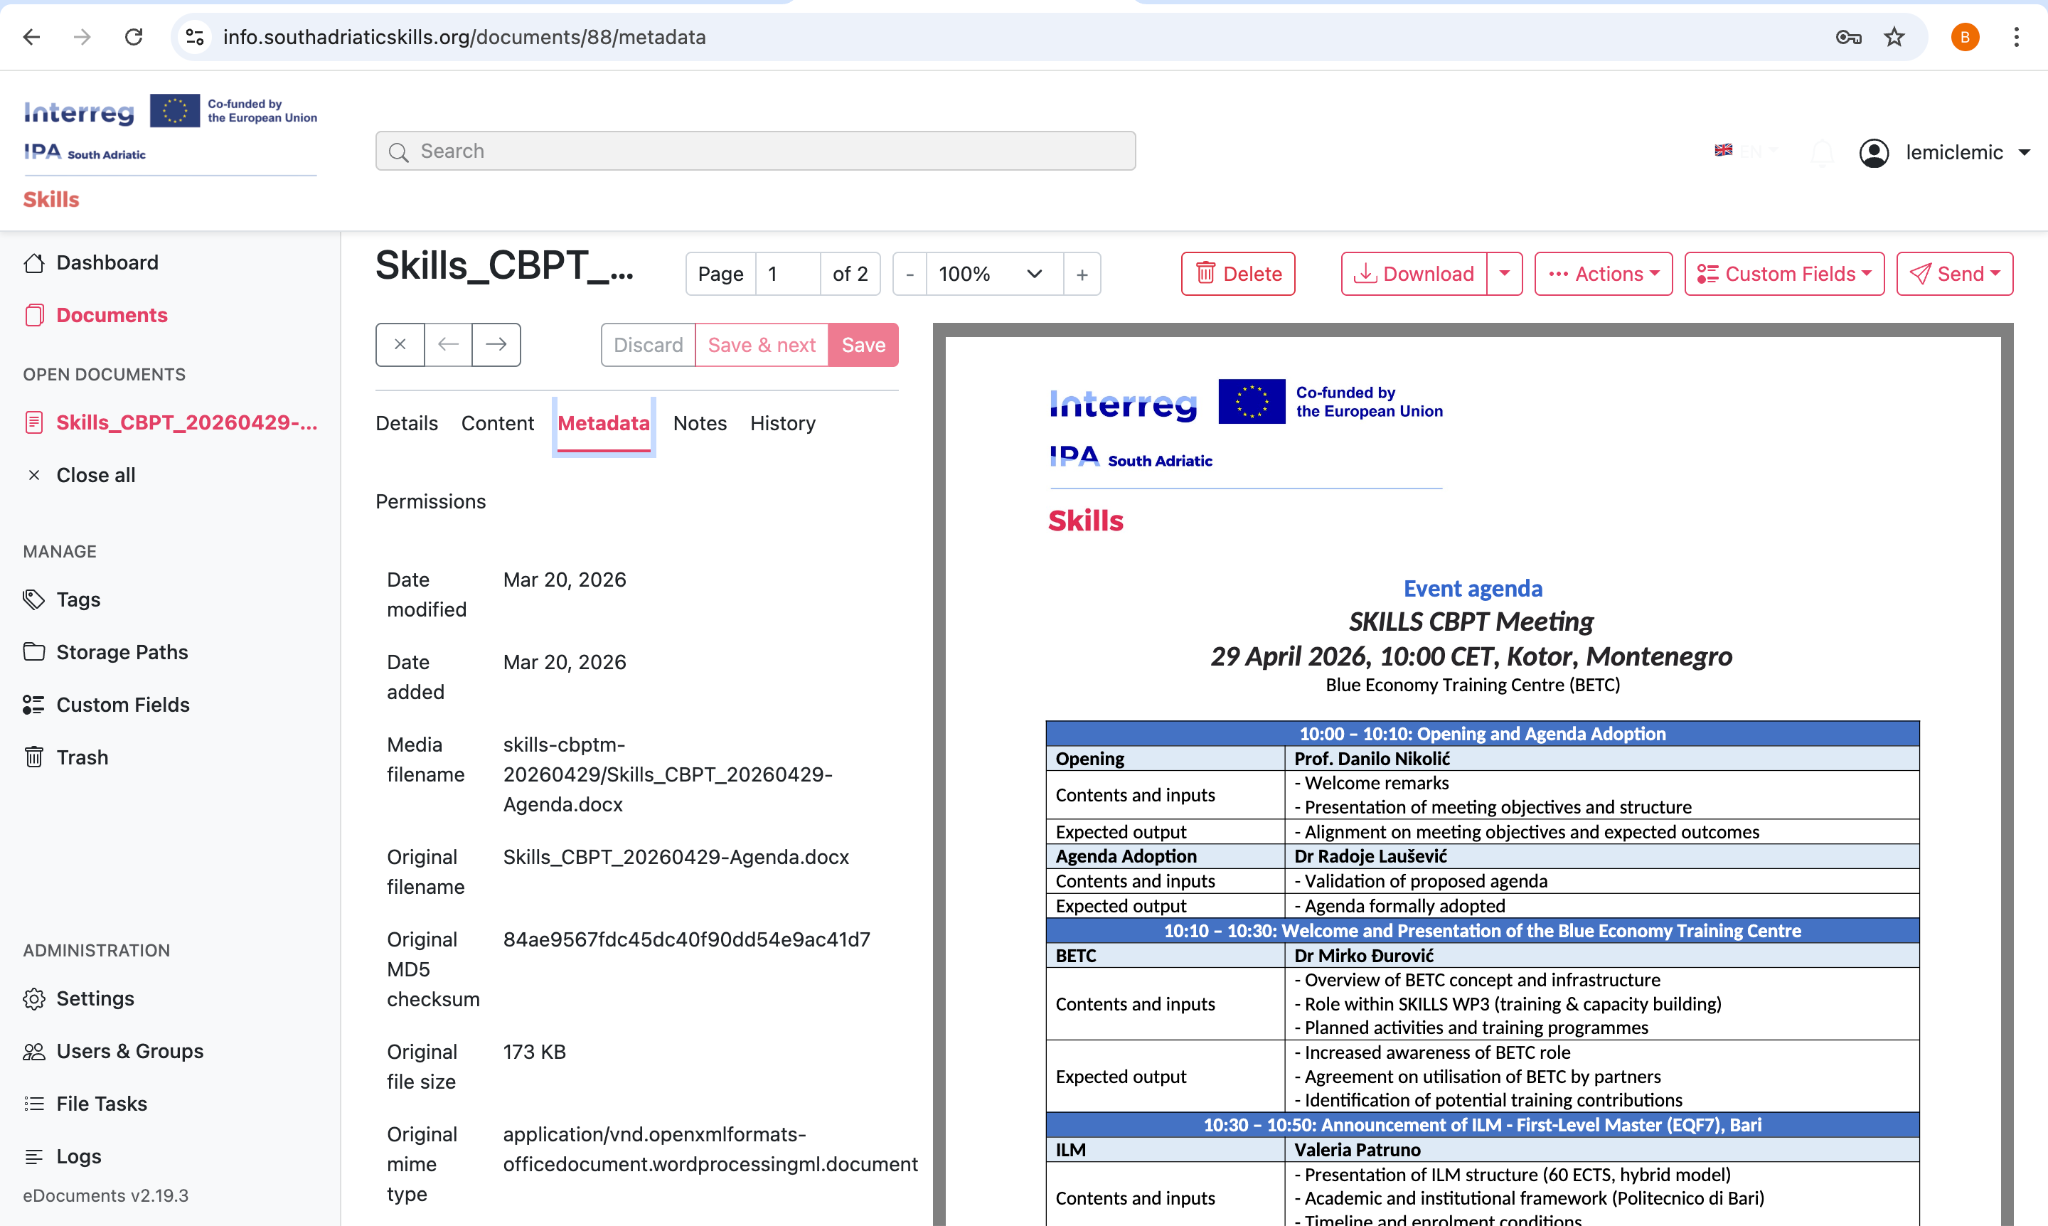
📸 Figure 4.2 — Editing document metadata in the detail view
Adding Notes to Documents
You can add comments and notes to any document for team collaboration:
- Open the document detail view
- Scroll down to the Notes section
- Type your note in the text field
- Click Add to post the note
Notes display the author's name and timestamp. You can edit or delete your own notes.
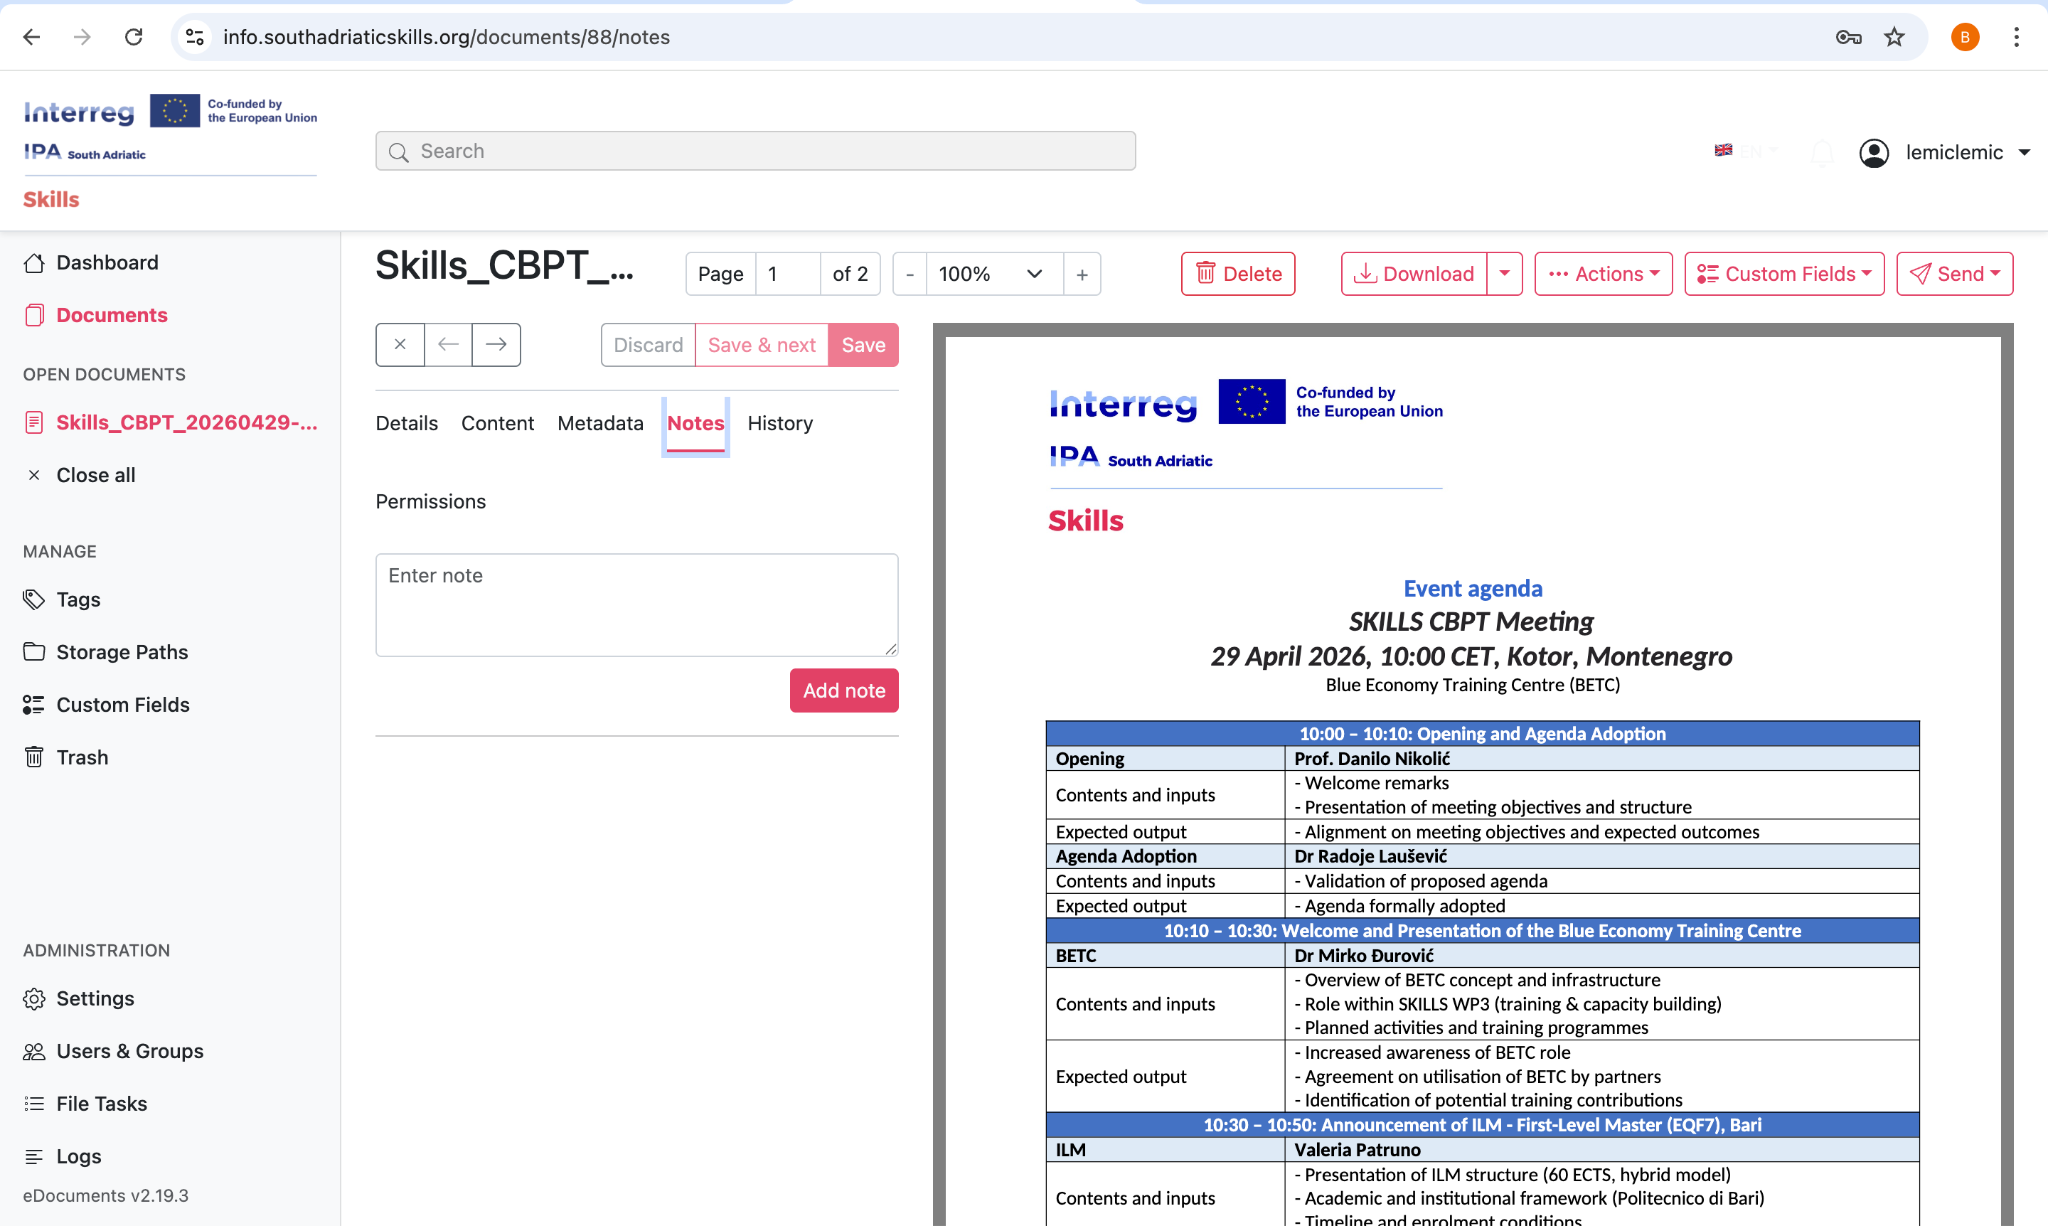
📸 Figure 4.3 — Adding and viewing notes on a document
Downloading Documents
Bulk Operations
Select multiple documents to perform batch operations:
- Select documents using checkboxes in the document list
- Bulk Edit: Set tags, storage path, or custom fields for multiple documents at once
- Bulk Download: Download multiple documents as a single archive
- Bulk Delete: Move multiple documents to the Trash
- Bulk Reprocess: Re-run OCR and processing on selected documents
- Merge Documents: Combine multiple PDF documents into a single file
- Rotate/Edit Pages: Rotate pages or remove specific pages from PDF documents
Uploading Documents
How to Upload
There are two main ways to upload documents:
- Go to the Dashboard (home page)
- Drag and drop files onto the upload area, or click to browse
- The document will begin processing automatically
- Click the upload button in the top navigation bar
- Select one or more files from your computer
- Optionally set metadata (title, tags, storage path, etc.) before uploading
- Click "Upload" to begin processing
📸 Figure 5.1 — The upload documents button
Setting Metadata During Upload
Automatic Processing
After upload, the system automatically performs these steps:
- File type detection and validation
- OCR text extraction (for images and scanned PDFs)
- Full-text indexing for search
- Thumbnail generation for preview
- Archive PDF creation (searchable, compressed version)
- Barcode detection for ASN assignment (if barcodes are present)

📸 Figure 5.2 — Document processing pipeline and OCR status in File Tasks
Search & Filtering
Global Search
The global search bar at the top of the interface allows you to search across all document content, titles, and metadata. Simply type your search terms and press Enter.
- Searches across document content (OCR text) and titles
- Provides autocomplete suggestions as you type
- Results are ranked by relevance
Filtering Documents
The filter panel in the Document List view provides powerful options to narrow down your document selection. You can combine multiple filters.
Text Filters
- Title contains / does not contain specific text
- Content contains / does not contain specific text
- ASN is / greater than / less than a specific number
Date Filters
- Created date: before / after / between specific dates
- Added date: before / after / between specific dates
- Modified date: before / after / between specific dates
Classification Filters
- Tags: has specific tag / has all specified tags / does not have tag
- Storage Path: is / is not a specific path
- Owner: filter by document owner
Other Filters
- File type (MIME type): filter by document format (PDF, image, etc.)
- Custom field values: filter based on custom metadata

📸 Figure 6.1 — The filter panel with combined filters active
Combine multiple filters to create precise document selections. For example, filter by tag "Invoices" AND created date in 2026 to find all invoices from this year.
Tags
Tags are flexible labels used to categorize and organize your documents. The DMS supports hierarchical tags with up to 5 levels of nesting and custom color coding for easy visual identification.
Creating a Tag
- Navigate to "Tags" in the left sidebar
- Click the "+" or "Create Tag" button
- Enter the tag name
- Select a display color for the tag
- Optionally select a parent tag to create a hierarchical structure
- Optionally configure auto-matching rules (see below)
- Click Save
Tag Hierarchy
Tags can be organized in a tree structure with up to 5 levels of nesting. This allows you to create detailed categorization schemes.
Finance
└─ Finance > Invoices
└─ Finance > Invoices > 2025
└─ Finance > Invoices > 2026
└─ Finance > Receipts
└─ Finance > Contracts
Color Coding
Each tag can have a unique color. Colors help you quickly identify document categories when browsing the document list. Choose distinctive colors for your most-used tags.
Inbox Tags
Tags can be marked as "Inbox" tags. Inbox tags are automatically applied to newly uploaded documents, making it easy to identify unprocessed items that need review.
Auto-Matching
Tags can be configured to automatically apply to documents based on their content. Available matching algorithms:
| Algorithm | Description |
|---|---|
| Any Word | Match if any of the specified words appear in the document |
| All Words | Match if all specified words appear in the document |
| Exact Match | Match the exact phrase in the document |
| Regular Expression | Match using a regex pattern for advanced matching |
| Fuzzy Match | Match with approximate string matching (tolerates typos) |
Create a tag called 'Invoice' with algorithm set to 'Any Word' and match text 'invoice, faktura, racun'. The tag will automatically be applied to any document containing any of those words.
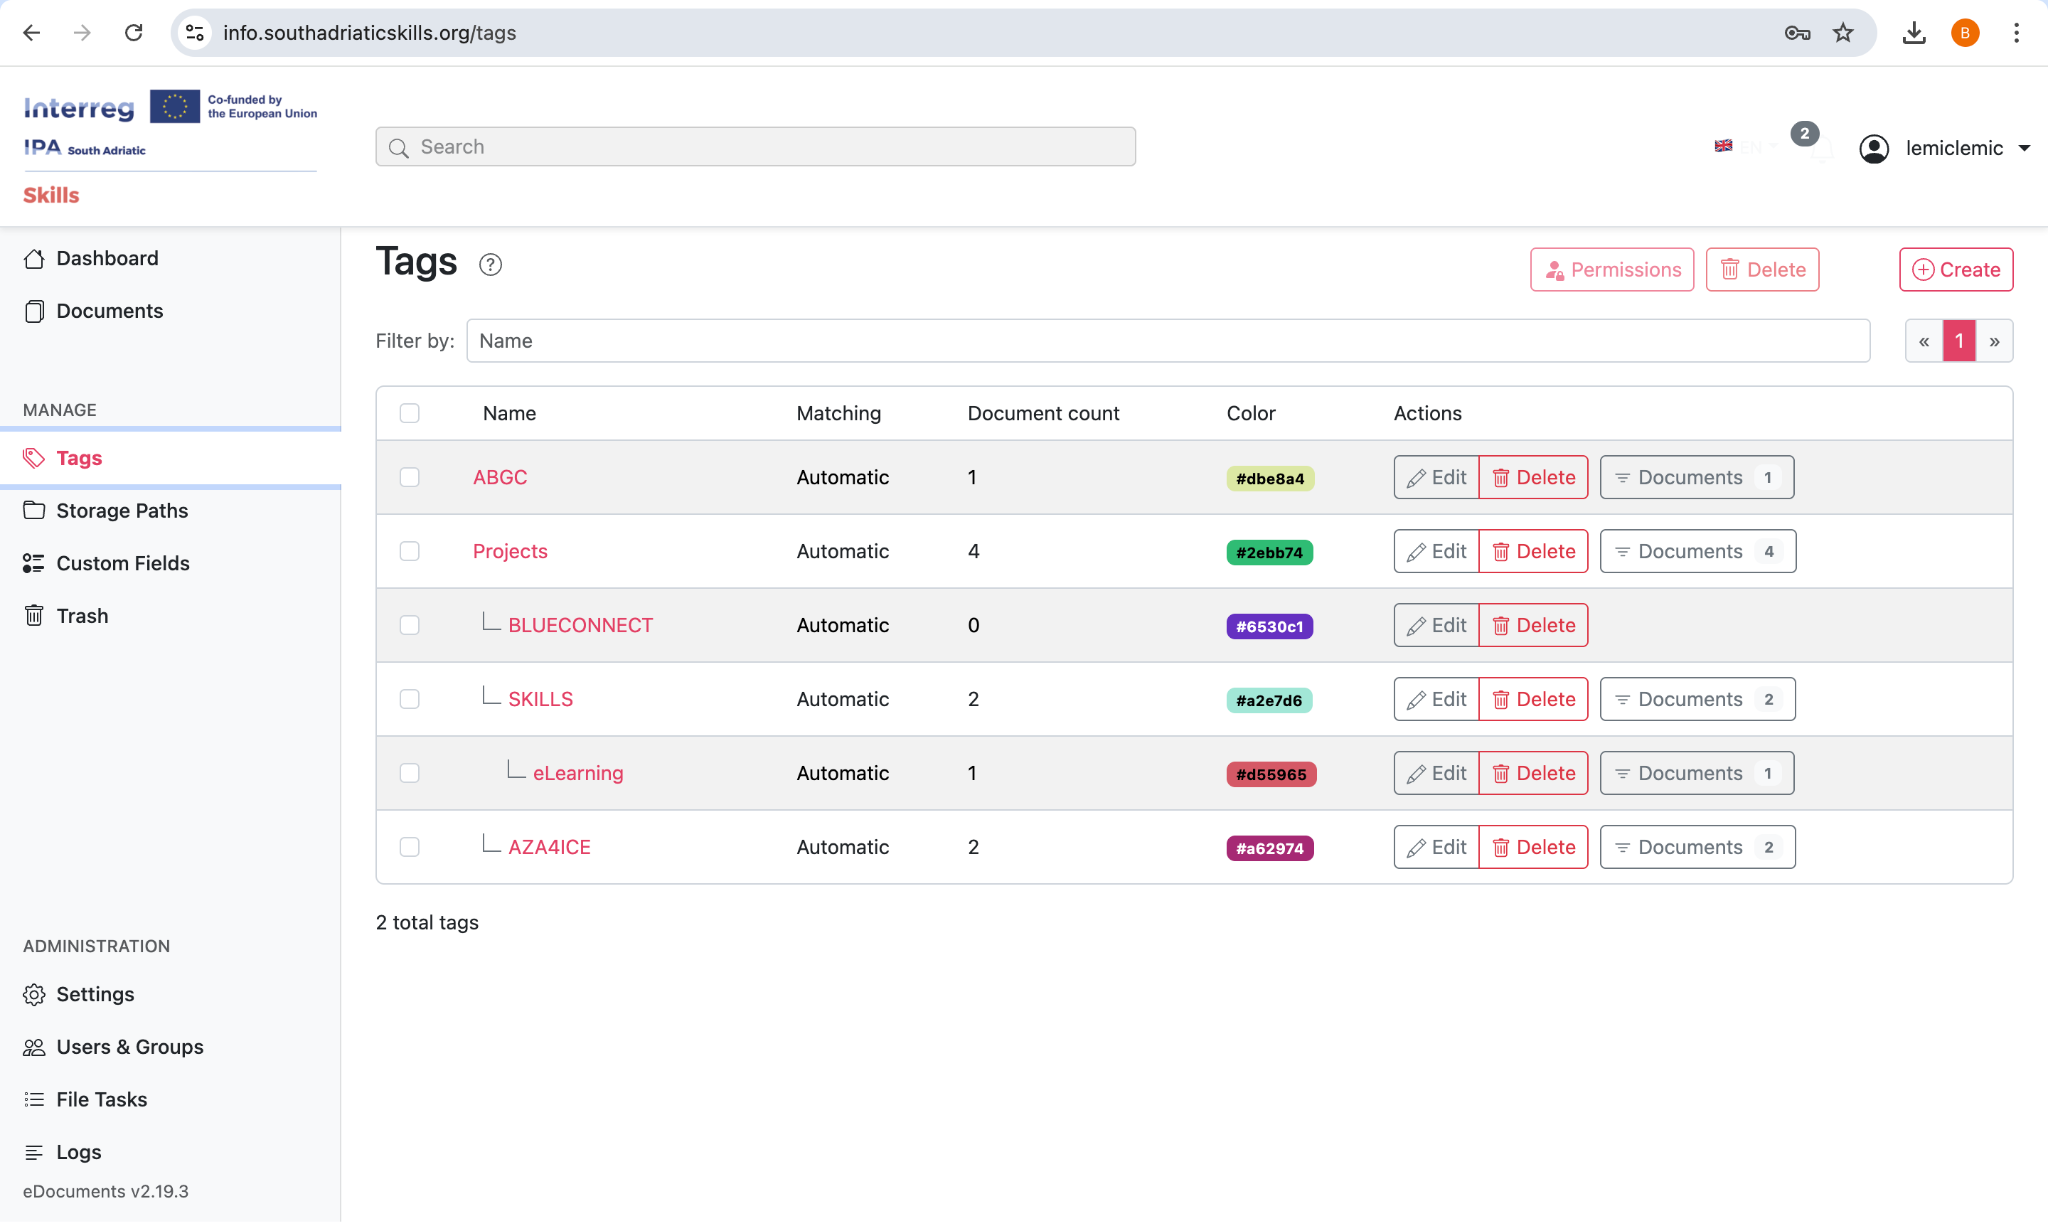
📸 Figure 7.1 — The Tags management screen with a hierarchical tag structure
Managing Tags
- View all tags in the Tags section of the sidebar
- Edit a tag by clicking on it to change its name, color, parent, or matching rules
- Delete a tag to remove it (documents are not deleted, only the tag assignment is removed)
- Tags with no documents assigned can be identified for cleanup
Storage Paths
Storage Paths define how documents are organized in the system's file structure. They support hierarchical structures up to 5 levels deep and can use dynamic templates.
Creating a Storage Path
- Navigate to "Storage Paths" in the left sidebar
- Click "Create Storage Path"
- Enter a name for the path
- Define the path template using variables (see below)
- Optionally select a parent path for hierarchical organization
- Click Save
Path Template Variables
| Variable | Description |
|---|---|
{title} |
The document title |
{created_year} |
Year the document was created (e.g., 2026) |
{created_month} |
Month the document was created (e.g., 02) |
{tags} |
Comma-separated list of document tags |
{asn} |
Archive serial number |
Template: {created_year}/{created_month}/{title}
A document titled 'Budget Report' created in February 2026 would be organized into:
2026/02/Budget Report
Auto-Matching for Storage Paths
Like tags, storage paths can be configured with auto-matching rules to automatically assign documents to the correct path based on their content.
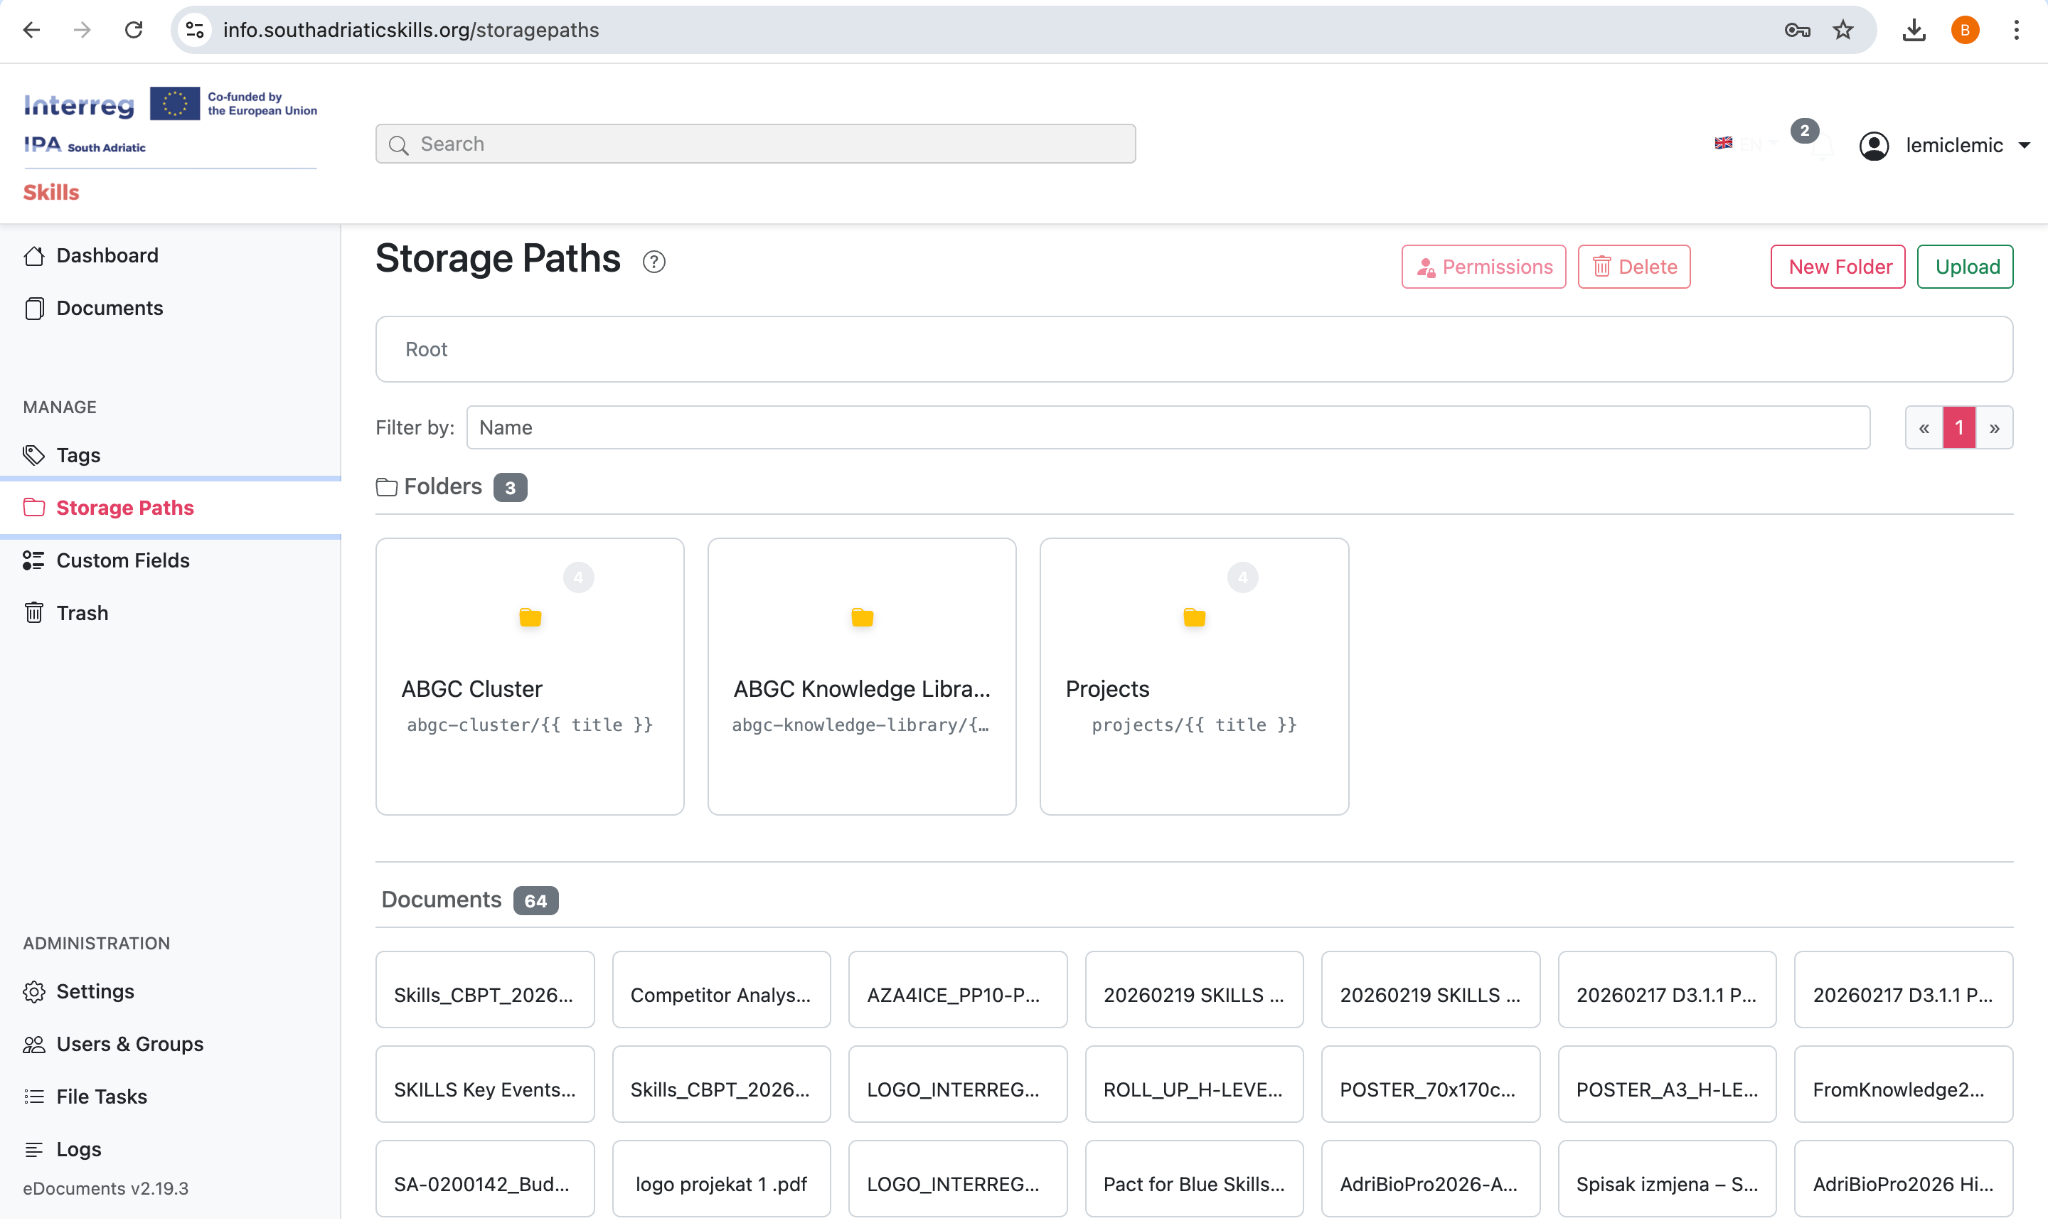
📸 Figure 8.1 — Storage path configuration with template variables
Custom Fields
Custom Fields allow you to extend document metadata beyond the standard fields. Create fields of various types to capture any additional information your project requires.
Available Field Types
| Field Type | Description | Example Use |
|---|---|---|
| String | Short text values | Reference number, project code |
| Long Text | Multi-line text | Description, abstract, notes |
| URL | Web links (clickable) | Related webpage, source link |
| Date | Date values with picker | Deadline, review date |
| Boolean | Yes/No toggle | Approved, reviewed, confidential |
| Integer | Whole numbers | Version number, quantity |
| Float | Decimal numbers | Score, percentage |
| Monetary | Currency values | Invoice amount, budget |
| Select | Dropdown with options | Status, priority, department |
| Document Link | Links to other documents | Related documents |
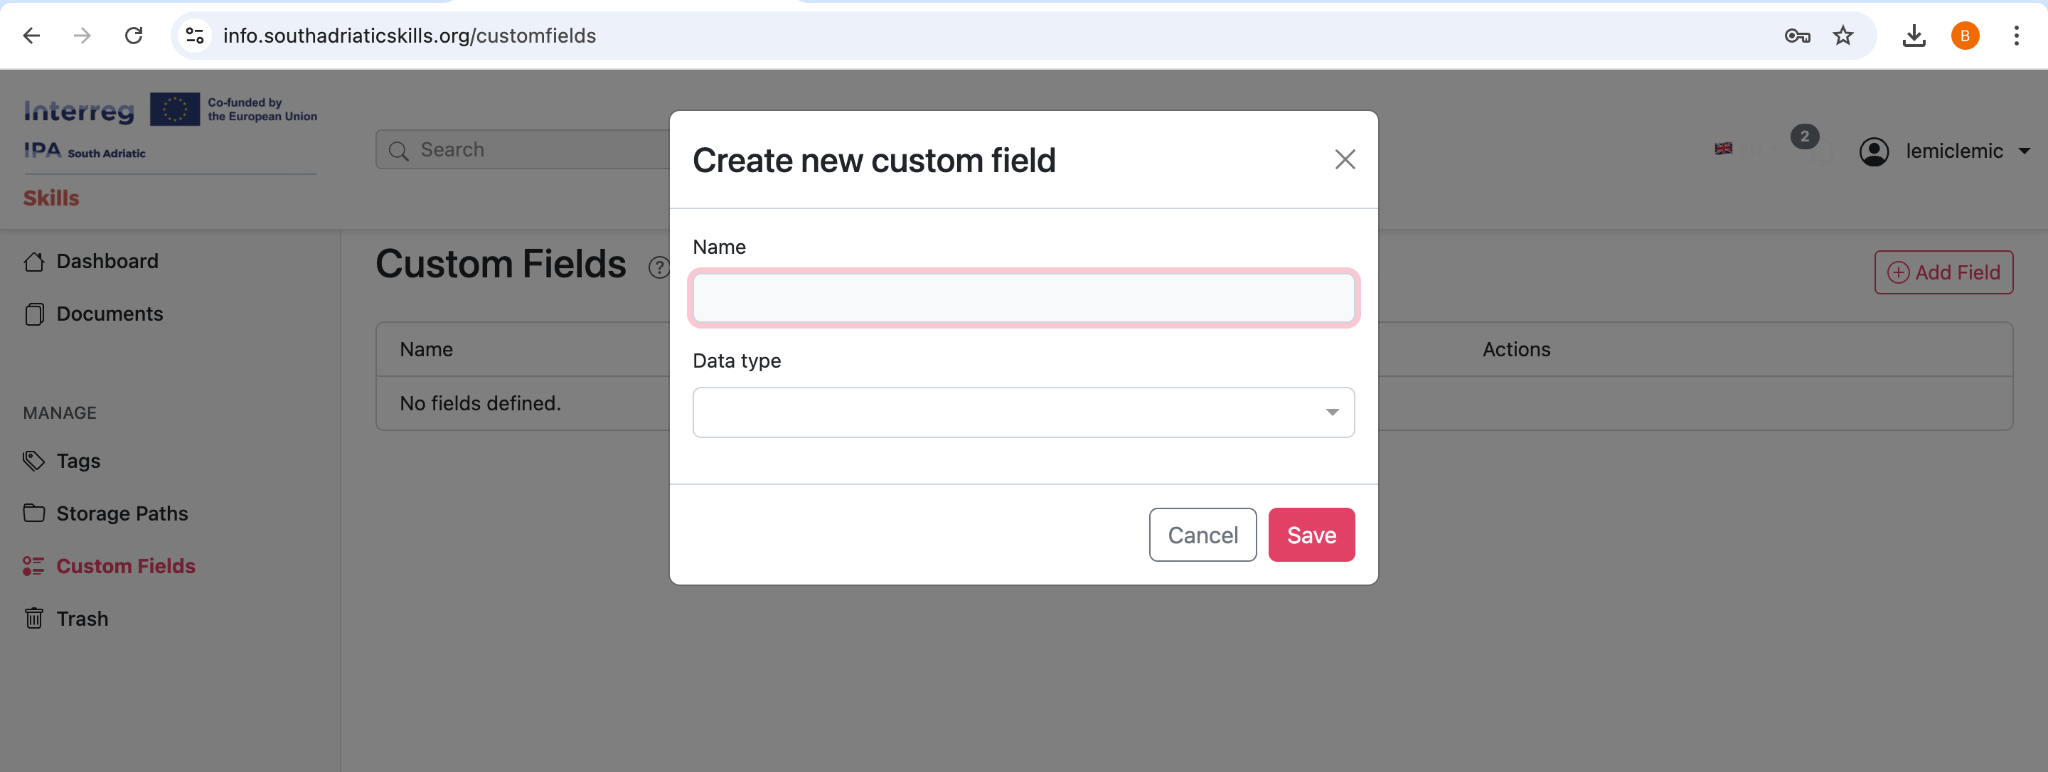
Creating a Custom Field
- Navigate to "Custom Fields" in the left sidebar
- Click "Create Custom Field"
- Enter a name for the field
- Select the data type from the available options
- For Select fields, define the dropdown options
- Click Save
Using Custom Fields
- Open the document detail view
- Locate the Custom Fields section in the metadata panel
- Click to add a field or edit an existing value
- Enter the value and save
📸 Figure 9.1 — Assigning custom field values in the document detail view
Document Editing with OnlyOffice
The DMS includes an integrated OnlyOffice editor that allows you to edit Word, Excel, and PowerPoint documents directly in your web browser without downloading them first.
Supported Editing Formats
.docx, .doc, .odt, .rtf — Full text editing with formatting
.xlsx, .xls, .ods — Spreadsheet editing with formulas
.pptx, .ppt, .odp — Slide editing with design tools
How to Edit a Document
- Open the document detail view by clicking on a supported document
- Click the "Edit in Office" button in the document Actions toolbar
- The OnlyOffice editor will open in your browser
- Make your changes using the familiar office editing interface
- Changes are saved automatically back to the DMS
When editing a document in OnlyOffice, the original file is modified. If you want to preserve the original version, download a copy before editing.
OnlyOffice Editor Features
- Text formatting: fonts, styles, colors, paragraphs, headers
- Tables, images, shapes, and charts
- Formulas and functions (Excel)
- Slide layouts, transitions, and animations (PowerPoint)
- Print and export options
- Spell checking
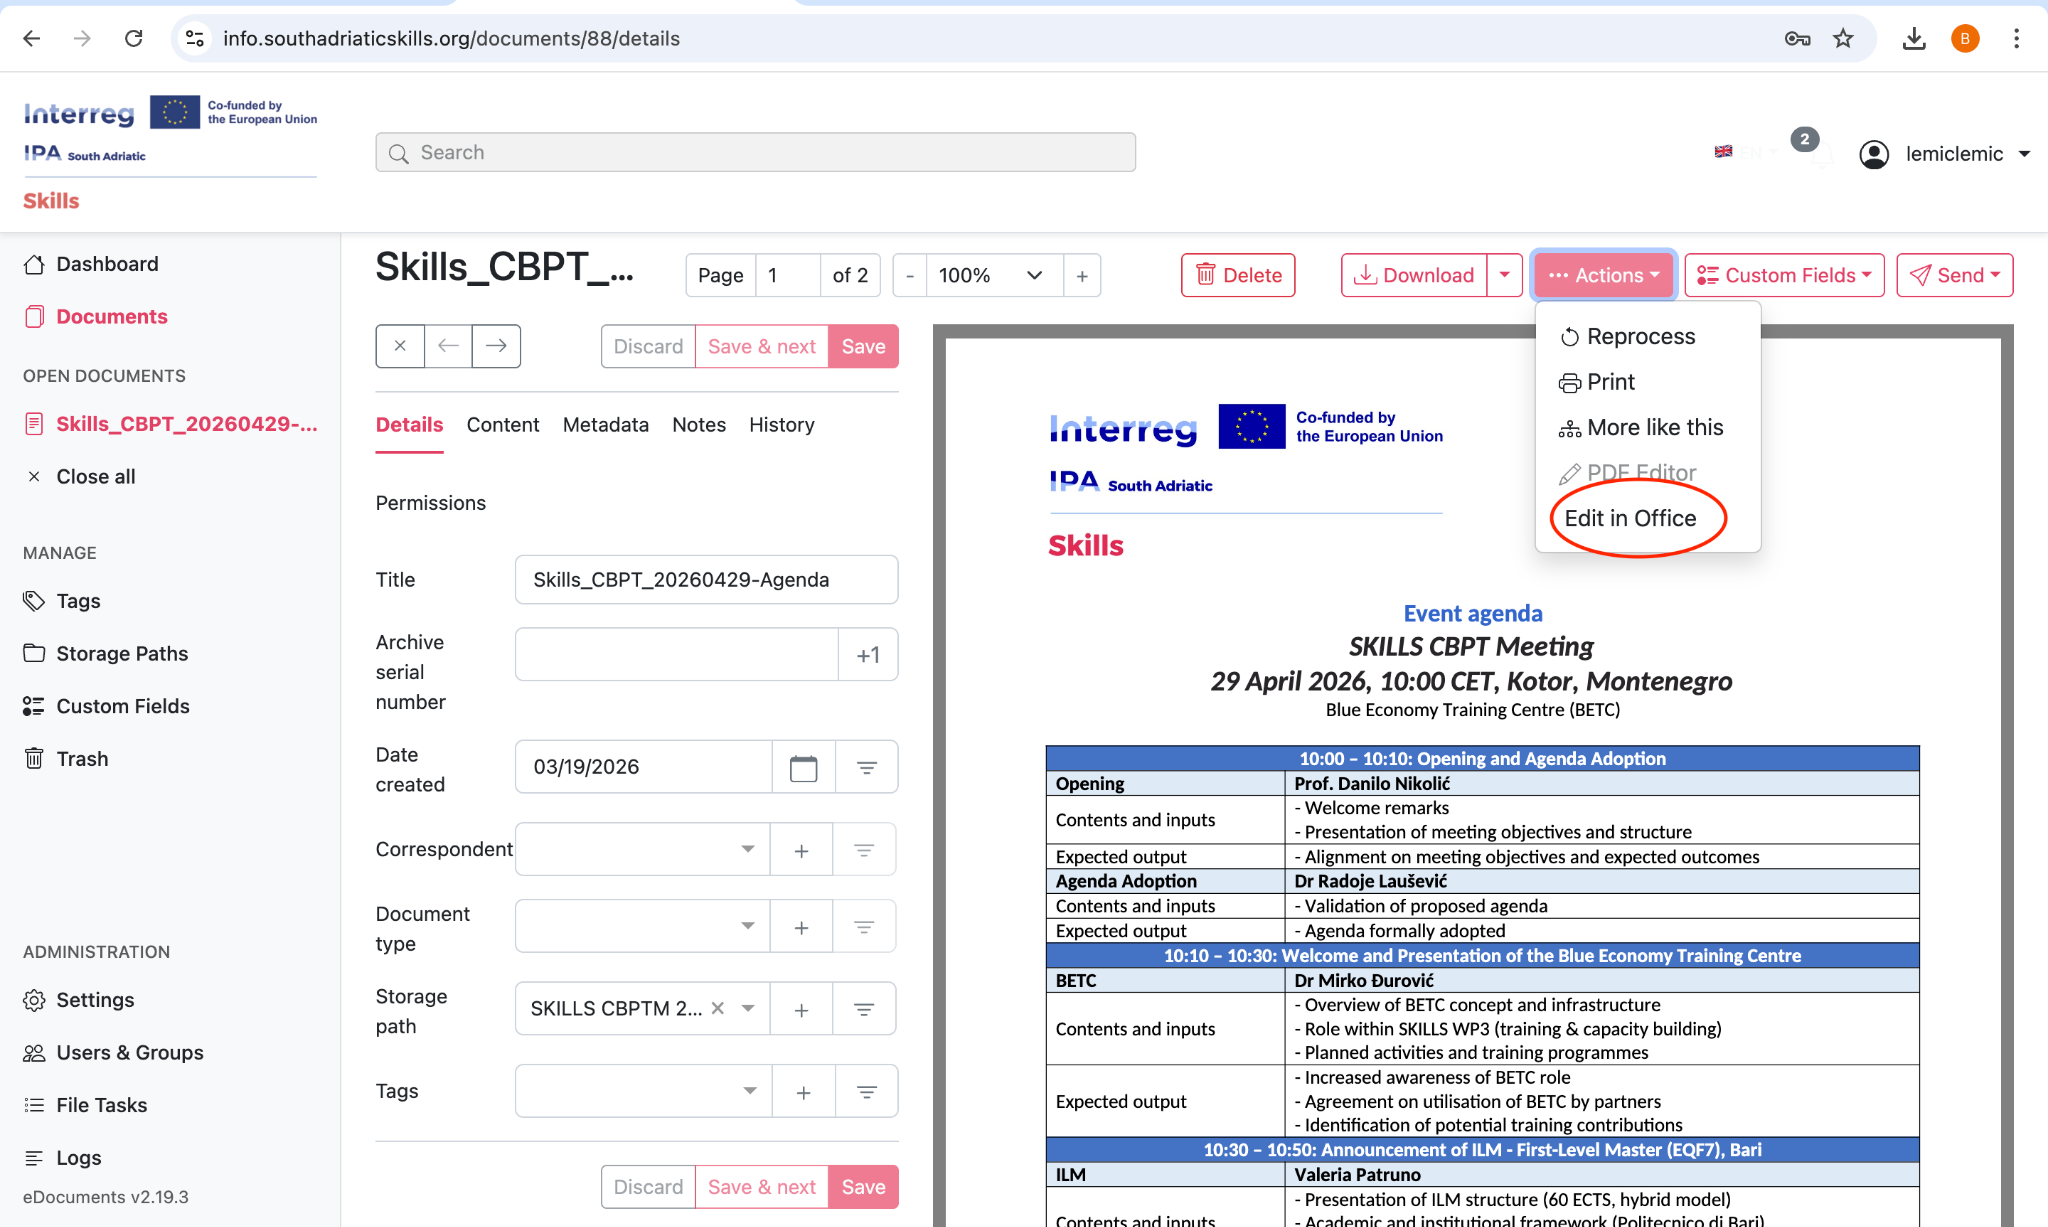
📸 Figure 10.1 — The integrated OnlyOffice editor in the browser
Trash & Document Recovery
The DMS uses a soft-delete system to protect against accidental deletion. When you delete a document, it is moved to the Trash where it can be recovered.
Deleting Documents
- Select one or more documents in the document list
- Click the Delete button
- Confirm the deletion
Deleted documents are moved to the Trash and are no longer visible in regular document lists or search results.
Recovering Documents from Trash
- Navigate to "Trash" in the left sidebar
- Browse or search for the document you want to recover
- Select the document and click "Restore"
- The document will be restored to its original location with all metadata intact
Permanent Deletion
- Individual documents can be permanently deleted from the Trash view
- The entire Trash can be emptied at once
Permanently deleted documents cannot be recovered. Always verify before performing permanent deletions.
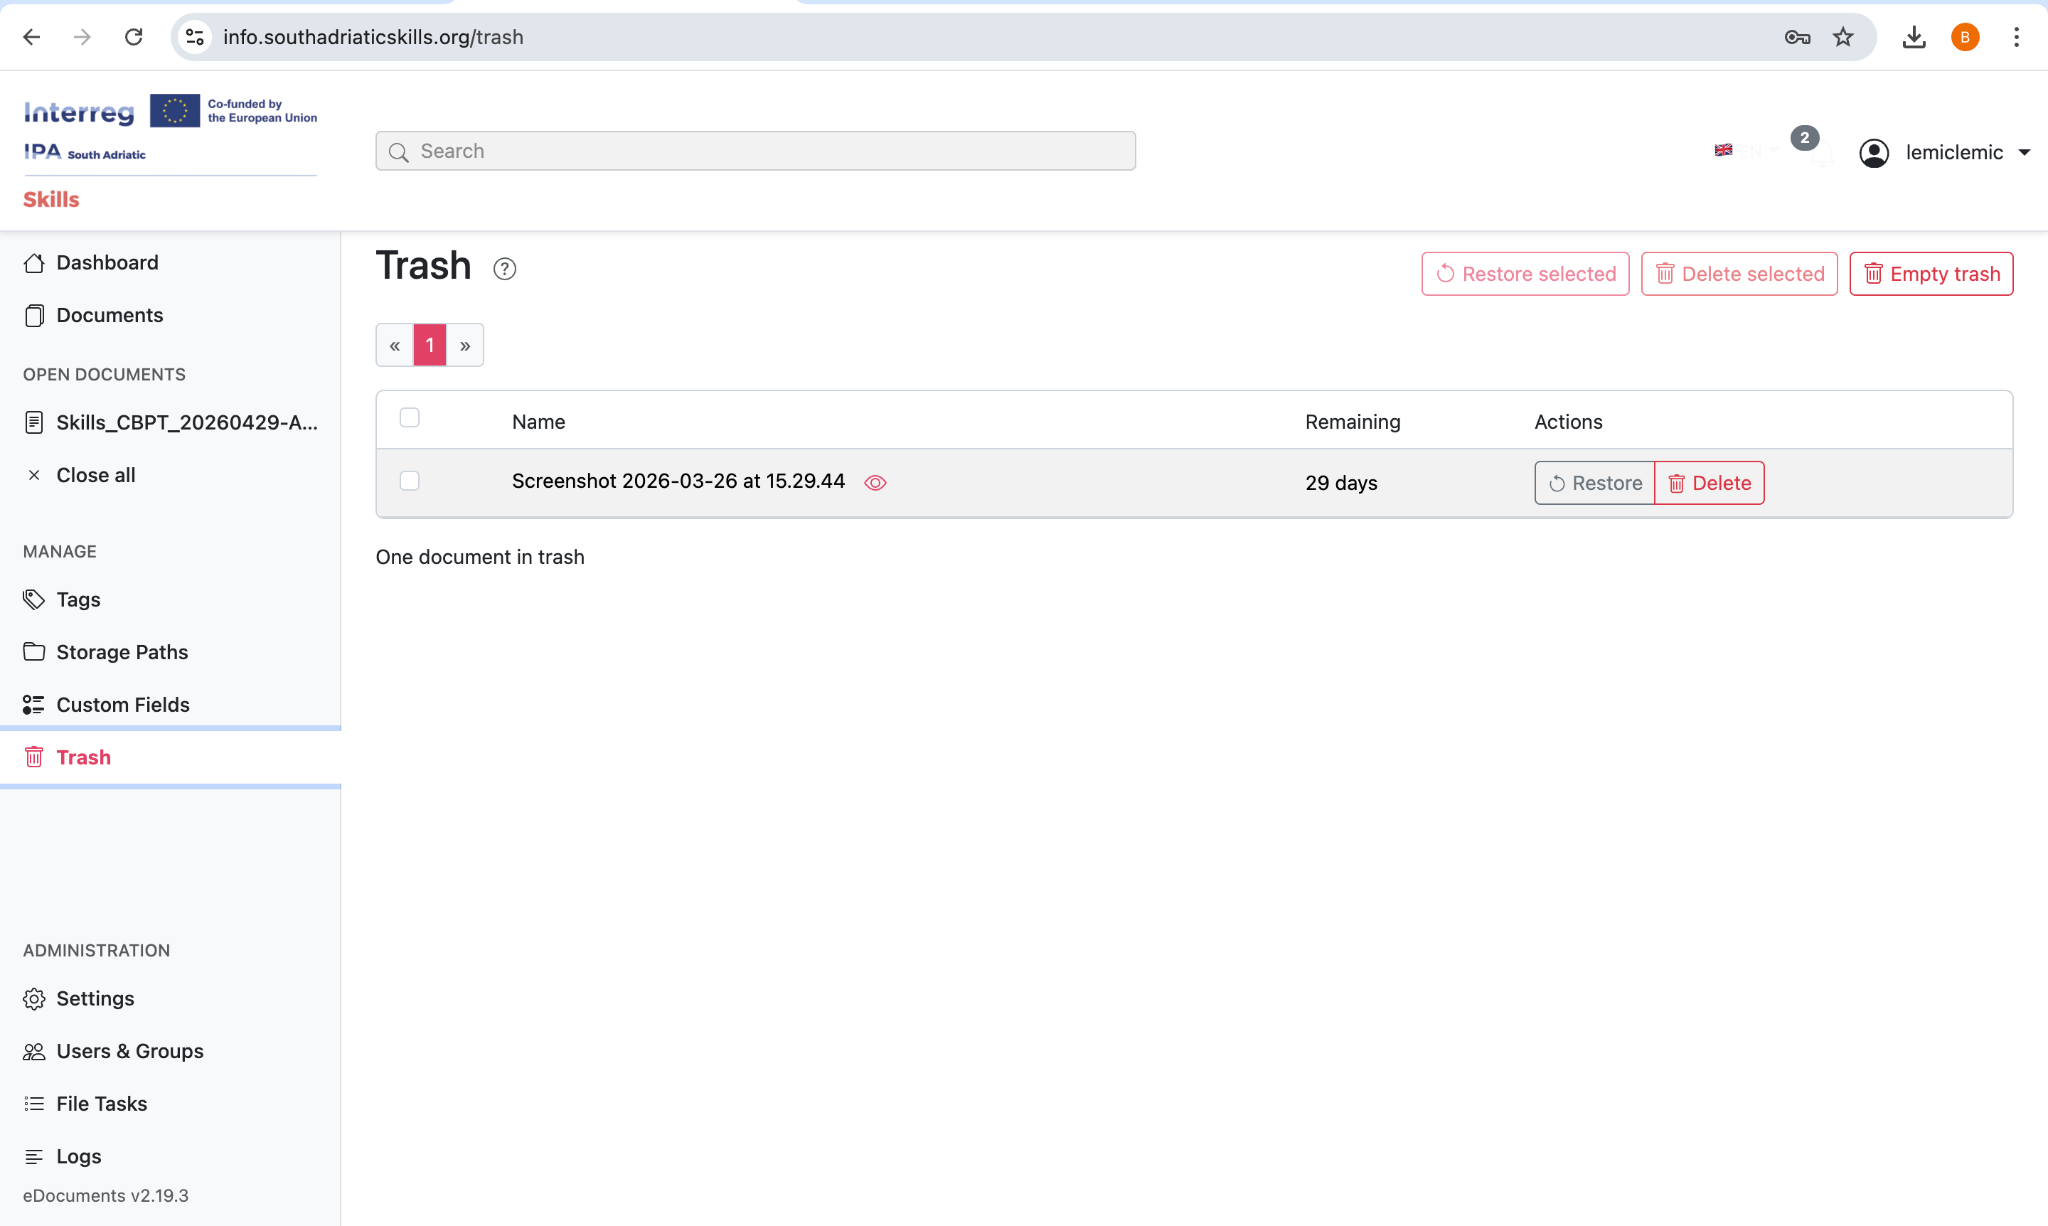
📸 Figure 11.1 — The Trash view for recovering or permanently deleting documents
User Management & Permissions
User Roles
| Role | Access Level | Description |
|---|---|---|
| ⬡ Superuser | Full System | Complete access to all features, settings, and data |
| ◈ Admin | Full System | Full access to all operational tasks and user management |
| ○ User | Limited | Access based on assigned permissions and document ownership |
Permission System
Model-Level Permissions
- View: Can see items in lists and detail pages
- Add: Can create new items (upload documents, create tags, etc.)
- Change: Can modify existing items
- Delete: Can move items to trash
Object-Level Permissions
- Assign specific View/Change/Delete permissions per document
- Grant permissions to individual users or entire groups
- Documents without explicit permissions are visible to all users
- Documents with explicit permissions restrict access to permitted users and the owner
Ownership
- Every document has an owner (typically the person who uploaded it)
- Owners always have full access to their own documents
- Administrators and superusers can access all documents regardless of permissions
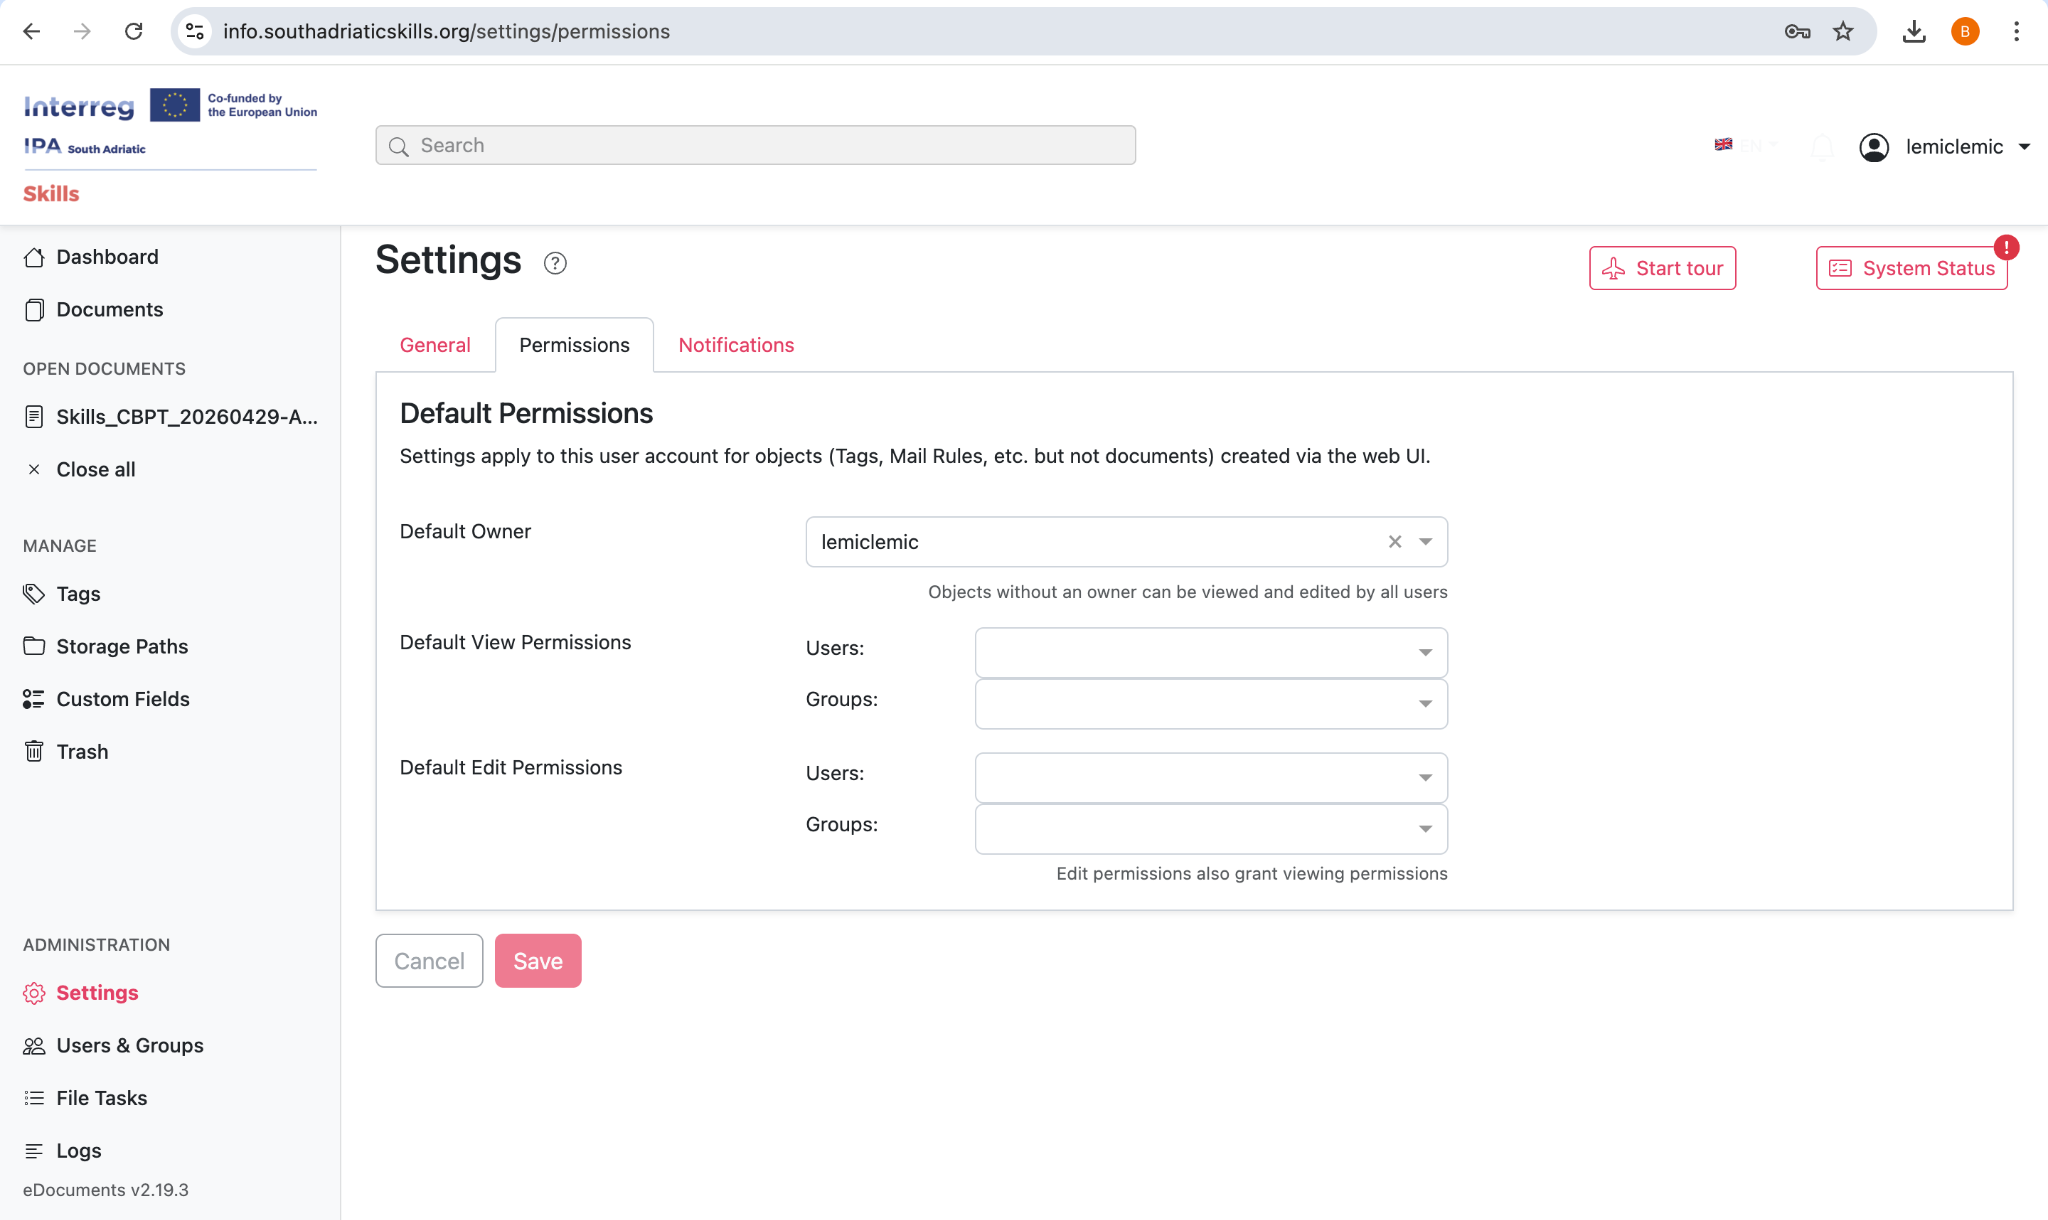
📸 Figure 12.1 — Document-level permissions configuration
Managing Users (Admin Only)
- Navigate to "Users & Groups" in the left sidebar
- Click "Add User" to create a new account
- Enter username, email, and initial password
- Assign the user to groups for batch permission management
- Set individual permissions as needed
- Click Save
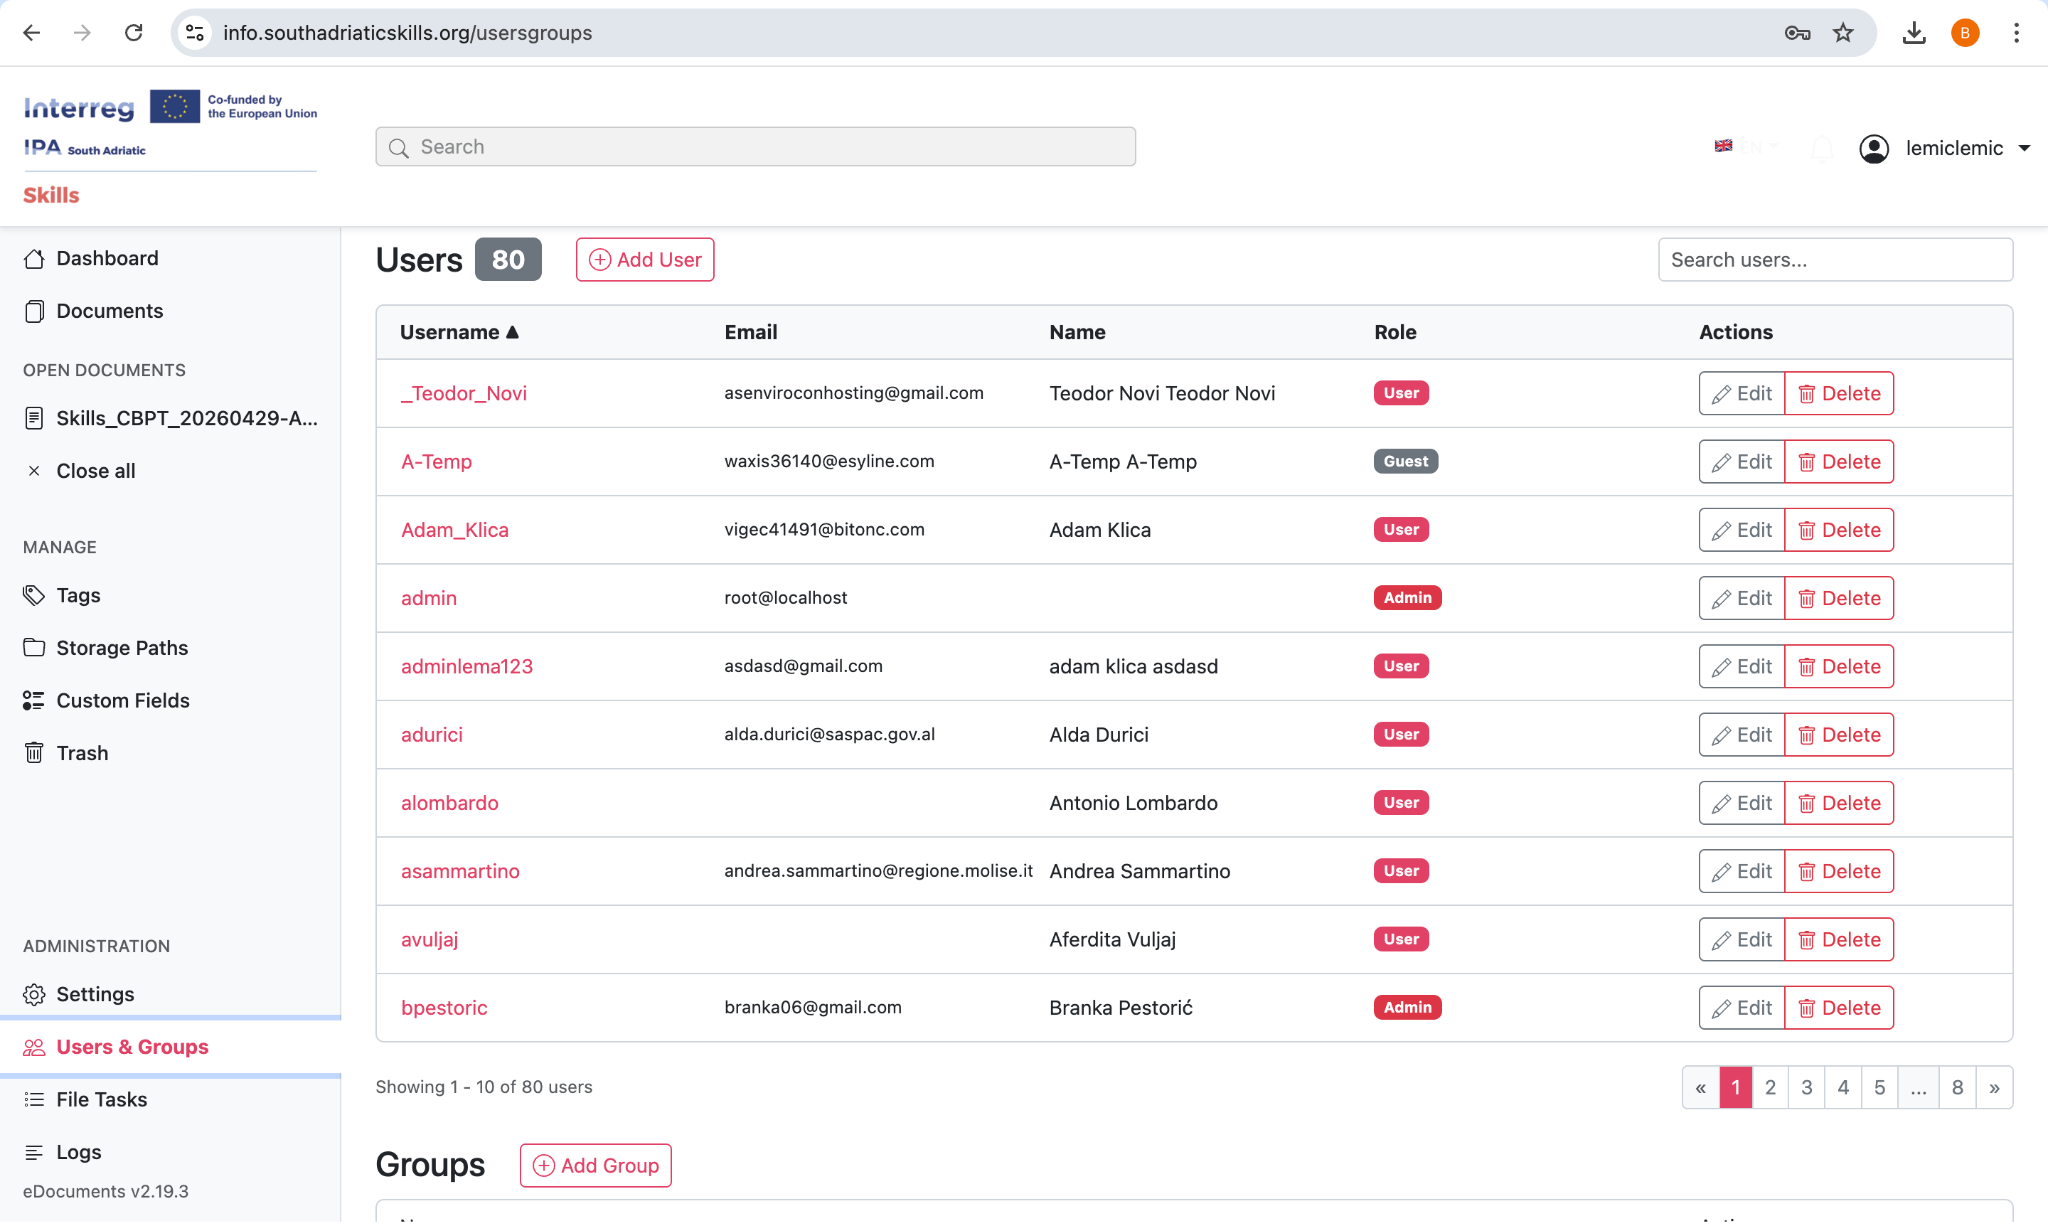
📸 Figure 12.2 — Creating and managing user accounts
Managing Groups (Admin Only)
Groups allow you to manage permissions for multiple users at once. Create groups like 'Editors', 'Viewers', or 'Project Managers' and assign appropriate permissions to each group.
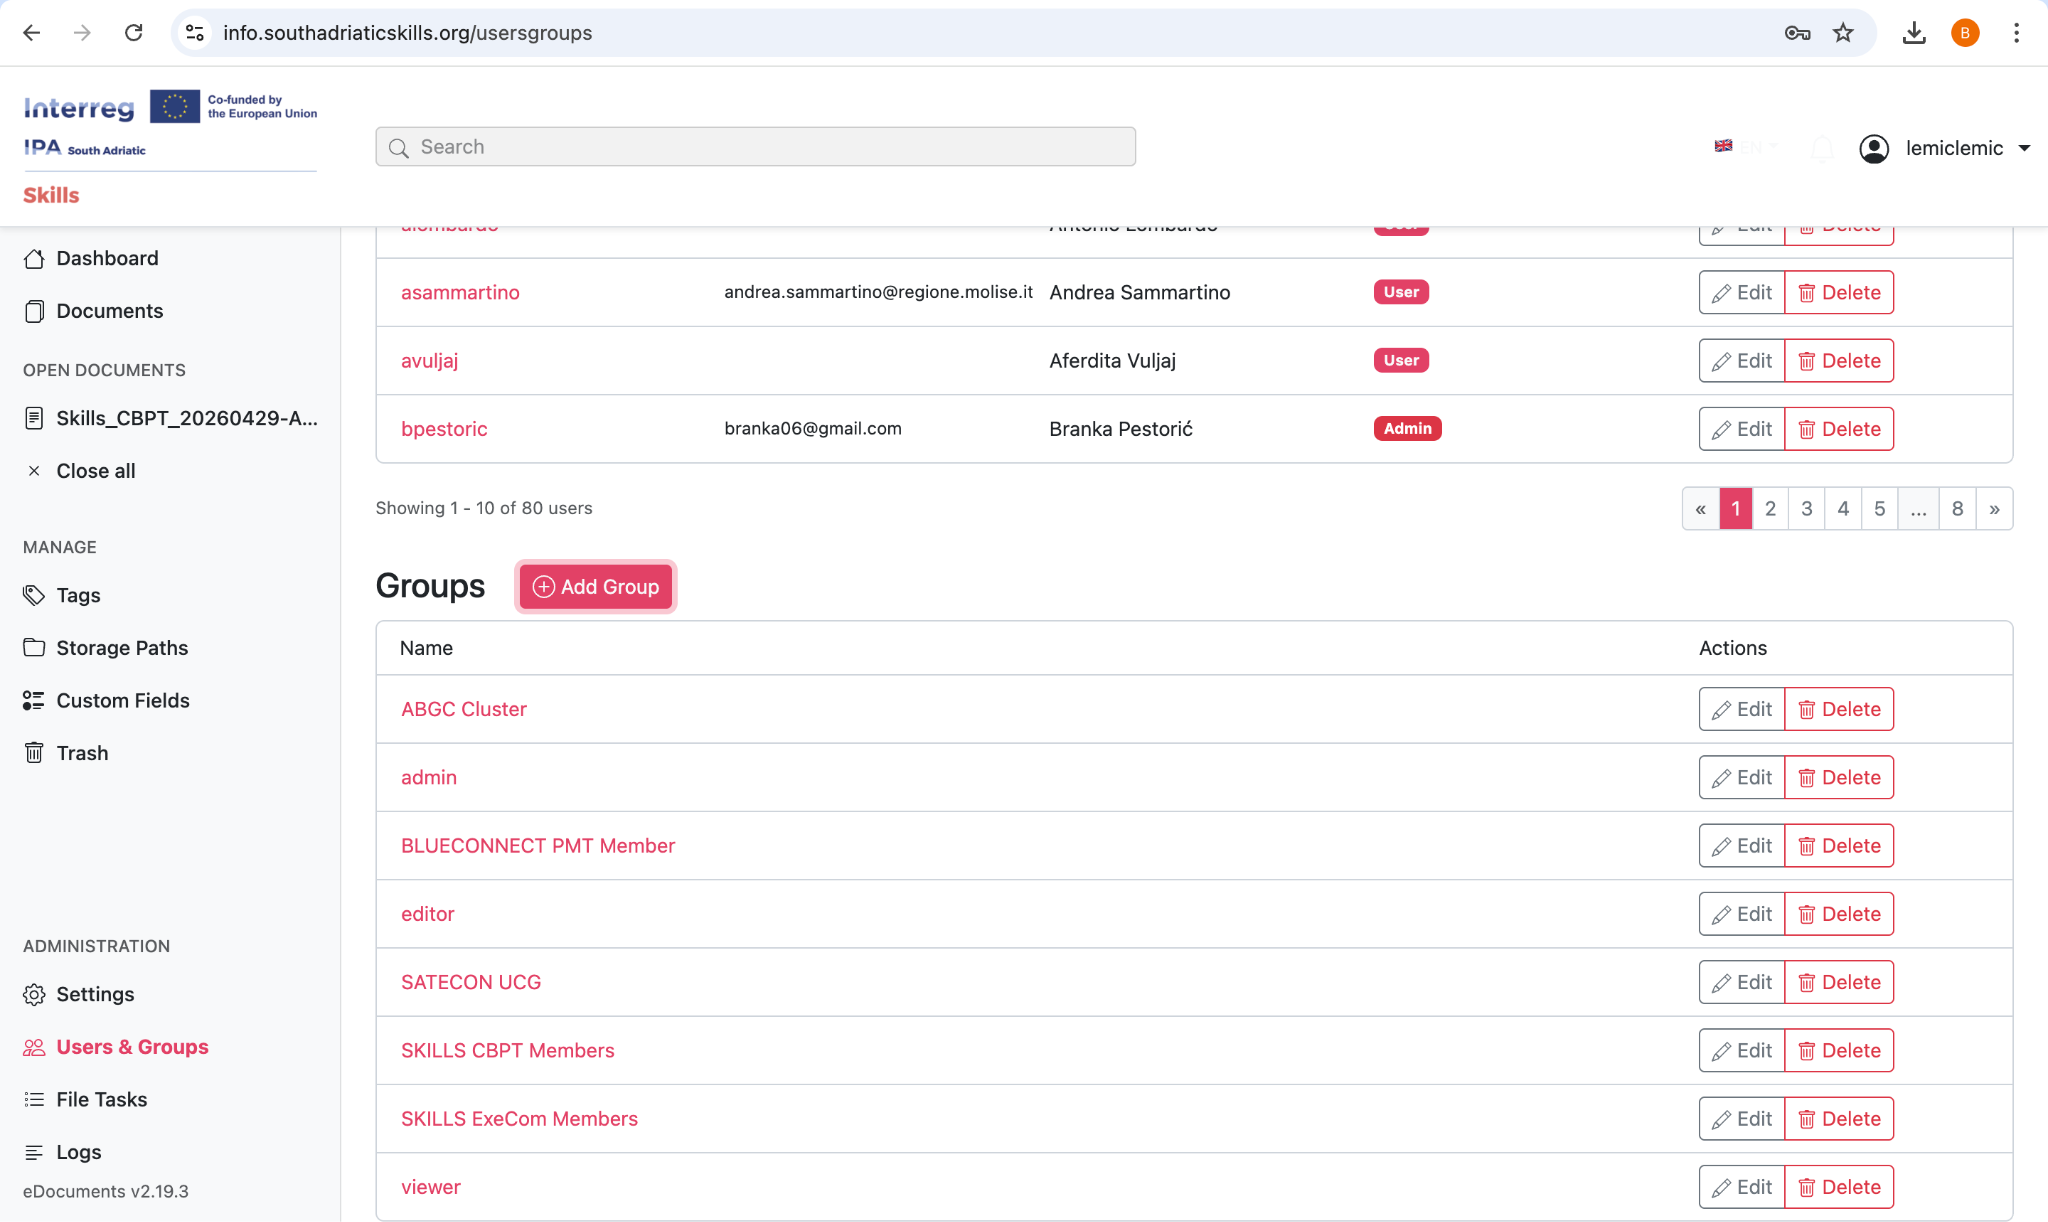
📸 Figure 12.3 — Managing groups and their permissions
Administration
The following features are available to administrators for system management.
File Tasks
The File Tasks section (accessible from the sidebar) shows all background processing tasks. This is where you can monitor the status of document uploads, OCR processing, and other operations.
- View currently running tasks with progress indicators
- See completed tasks with their results
- Identify and investigate failed tasks
- Acknowledge completed task notifications
System Logs
The Logs section provides detailed system activity records for troubleshooting and auditing.
- Document processing logs (OCR, conversion, indexing)
- User authentication events
- Error logs with diagnostic information
Application Settings
Administrators can configure the following system settings:
Supported File Formats
The DMS supports a wide range of document formats. All uploaded documents are preserved in their original format, and a searchable archive PDF is generated automatically.
PDF & Image Files
These formats are processed with OCR for full-text search:
| Format | Extensions |
|---|---|
| PDF Document | .pdf |
| JPEG Image | .jpg, .jpeg |
| PNG Image | .png |
| TIFF Image | .tif, .tiff |
| GIF Image | .gif |
| BMP Image | .bmp |
| WebP Image | .webp |
Office Documents
These formats can be viewed, searched, and edited with OnlyOffice:
| Format | Extensions |
|---|---|
| Microsoft Word | .doc, .docx |
| Microsoft Excel | .xls, .xlsx |
| Microsoft PowerPoint | .ppt, .pptx, .ppsx |
| OpenDocument Text | .odt |
| OpenDocument Spreadsheet | .ods |
| OpenDocument Presentation | .odp |
| Rich Text Format | .rtf |
Plain Text & Data Files
| Format | Extensions |
|---|---|
| Plain Text | .txt |
| CSV Data | .csv |
Troubleshooting & FAQ
Common Issues
- Verify your username/email and password are correct
- Check if Caps Lock is enabled on your keyboard
- Use the "Forgot your password?" link to reset your password
- Contact your administrator if your account may be disabled
- Document processing takes time — check File Tasks for processing status
- Verify the file format is supported (see Chapter 14)
- Clear any active filters in the document list that may be hiding results
- Try refreshing the page
- Ensure the original scan is of good quality (300 DPI minimum recommended)
- Check that the document language matches the OCR configuration
- Try re-processing the document via bulk operations (Reprocess)
- Handwritten text and decorative fonts may not be recognized accurately
- The document may have specific permissions that restrict your access
- Verify you belong to the correct user group
- Contact your administrator to review your permission settings
- Ensure you are using a supported file format (.docx, .xlsx, .pptx, etc.)
- Try clearing your browser cache and refreshing the page
- Check your internet connection stability
- Contact your administrator if the issue persists